> ## Documentation Index
> Fetch the complete documentation index at: https://docs.cysmiq.com/llms.txt
> Use this file to discover all available pages before exploring further.
# Manage API keys
> Create and manage personal or workspace API keys for automation and integrations.
## Overview
API keys provide programmatic access for CI pipelines, integrations, and tooling. Cysmiq supports two types of keys:
* **Personal API keys**: Scoped to your user account. Can be restricted to specific workspaces.
* **Workspace API keys**: Scoped to a workspace (tenant). Managed by workspace admins for shared integrations.
## Create an API key
Open the **Workspaces** page, select **Security**, then scroll to **API keys**.
Use `https://app.cysmiq.com/workspaces` for Cysmiq Cloud. For self-hosted, use your Cysmiq app URL.
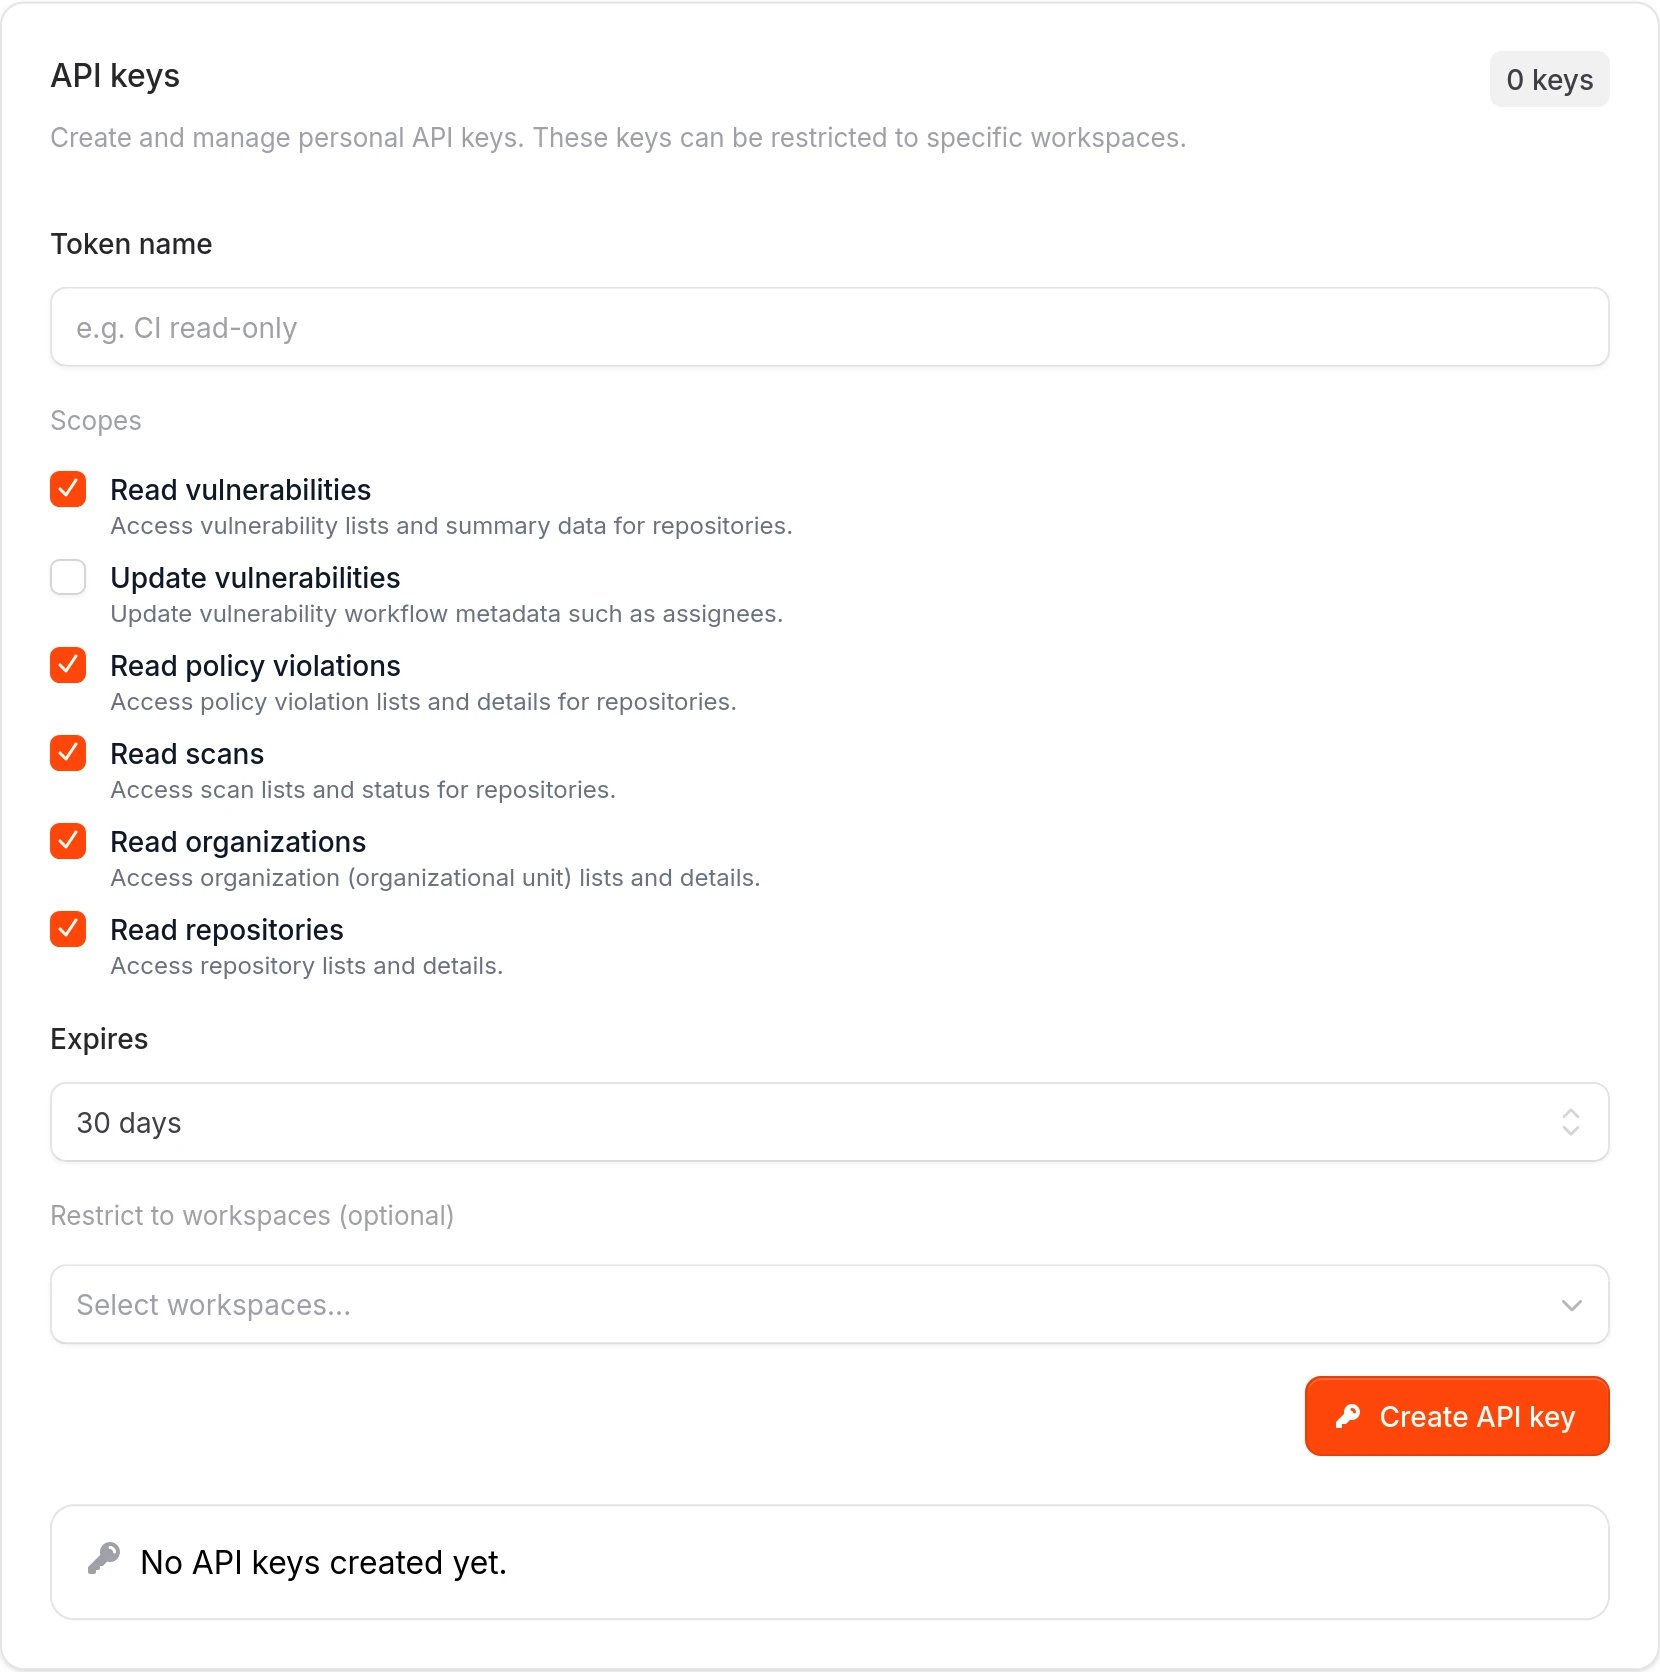 Admin access to the workspace is required
From the workspace sidebar, select **Settings**, then **Security** under Administration.
Admin access to the workspace is required
From the workspace sidebar, select **Settings**, then **Security** under Administration.
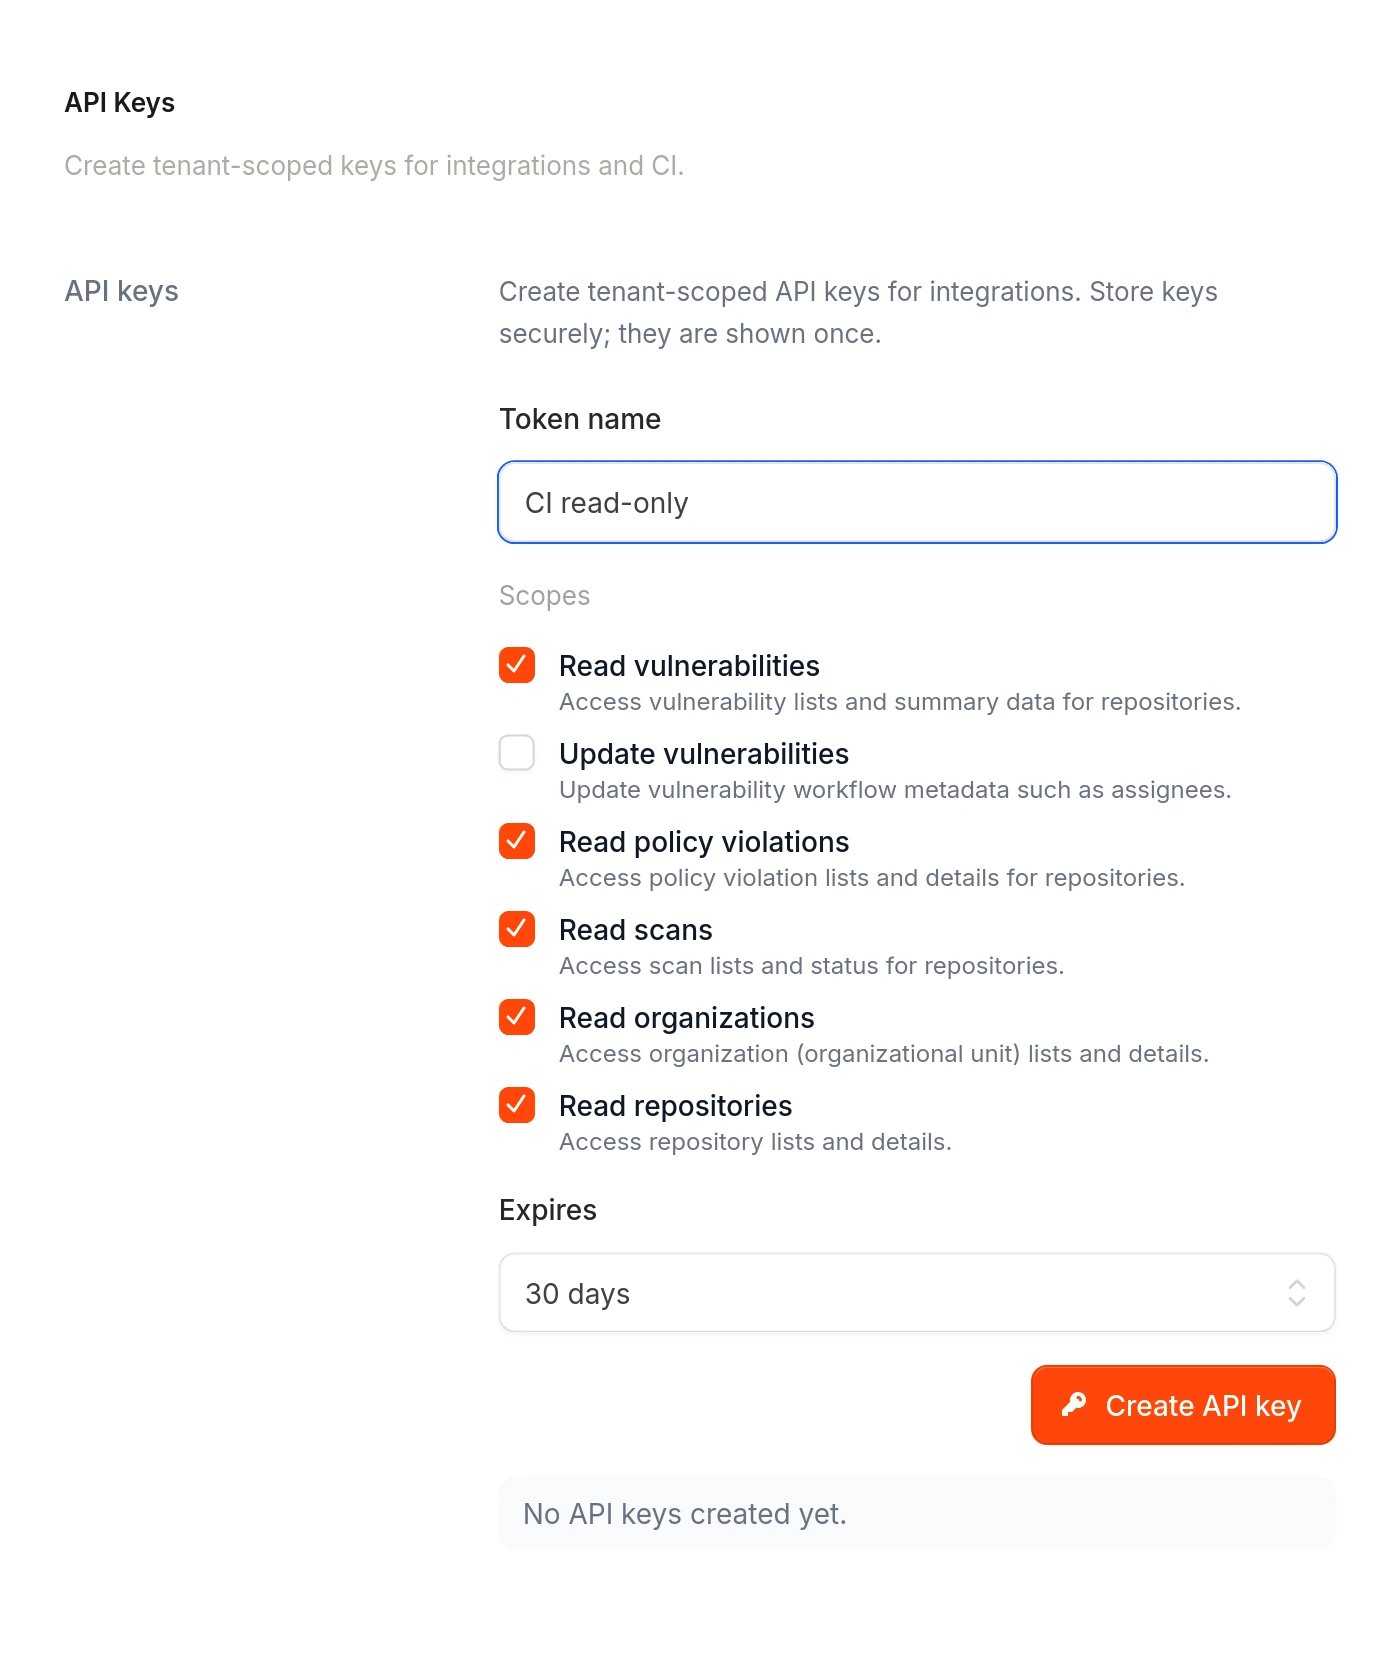 Enter a descriptive **Token name** to identify the key's purpose, such as "CI read-only" or "GitHub Actions".
Select the **Scopes** for the key. For a CI read-only key, keep read scopes enabled and leave write scopes disabled. Available read scopes include:
* **Read vulnerabilities** (`vulnerabilities:read`): Access vulnerability lists and summary data
* **Read policy violations** (`policy-violations:read`): Access policy violation lists and details
* **Read scans** (`scans:read`): Access scan lists and status
* **Read organizations** (`organizations:read`): Access organization lists and details
* **Read repositories** (`repositories:read`): Access repository lists and details
Choose an **Expires** value. Shorter expirations are more secure but require more frequent rotation.
Optionally restrict the key to specific workspaces using **Restrict to workspaces**. If no workspaces are selected, the key works across all workspaces you have access to.
Enter a descriptive **Token name** to identify the key's purpose, such as "CI read-only" or "GitHub Actions".
Select the **Scopes** for the key. For a CI read-only key, keep read scopes enabled and leave write scopes disabled. Available read scopes include:
* **Read vulnerabilities** (`vulnerabilities:read`): Access vulnerability lists and summary data
* **Read policy violations** (`policy-violations:read`): Access policy violation lists and details
* **Read scans** (`scans:read`): Access scan lists and status
* **Read organizations** (`organizations:read`): Access organization lists and details
* **Read repositories** (`repositories:read`): Access repository lists and details
Choose an **Expires** value. Shorter expirations are more secure but require more frequent rotation.
Optionally restrict the key to specific workspaces using **Restrict to workspaces**. If no workspaces are selected, the key works across all workspaces you have access to.
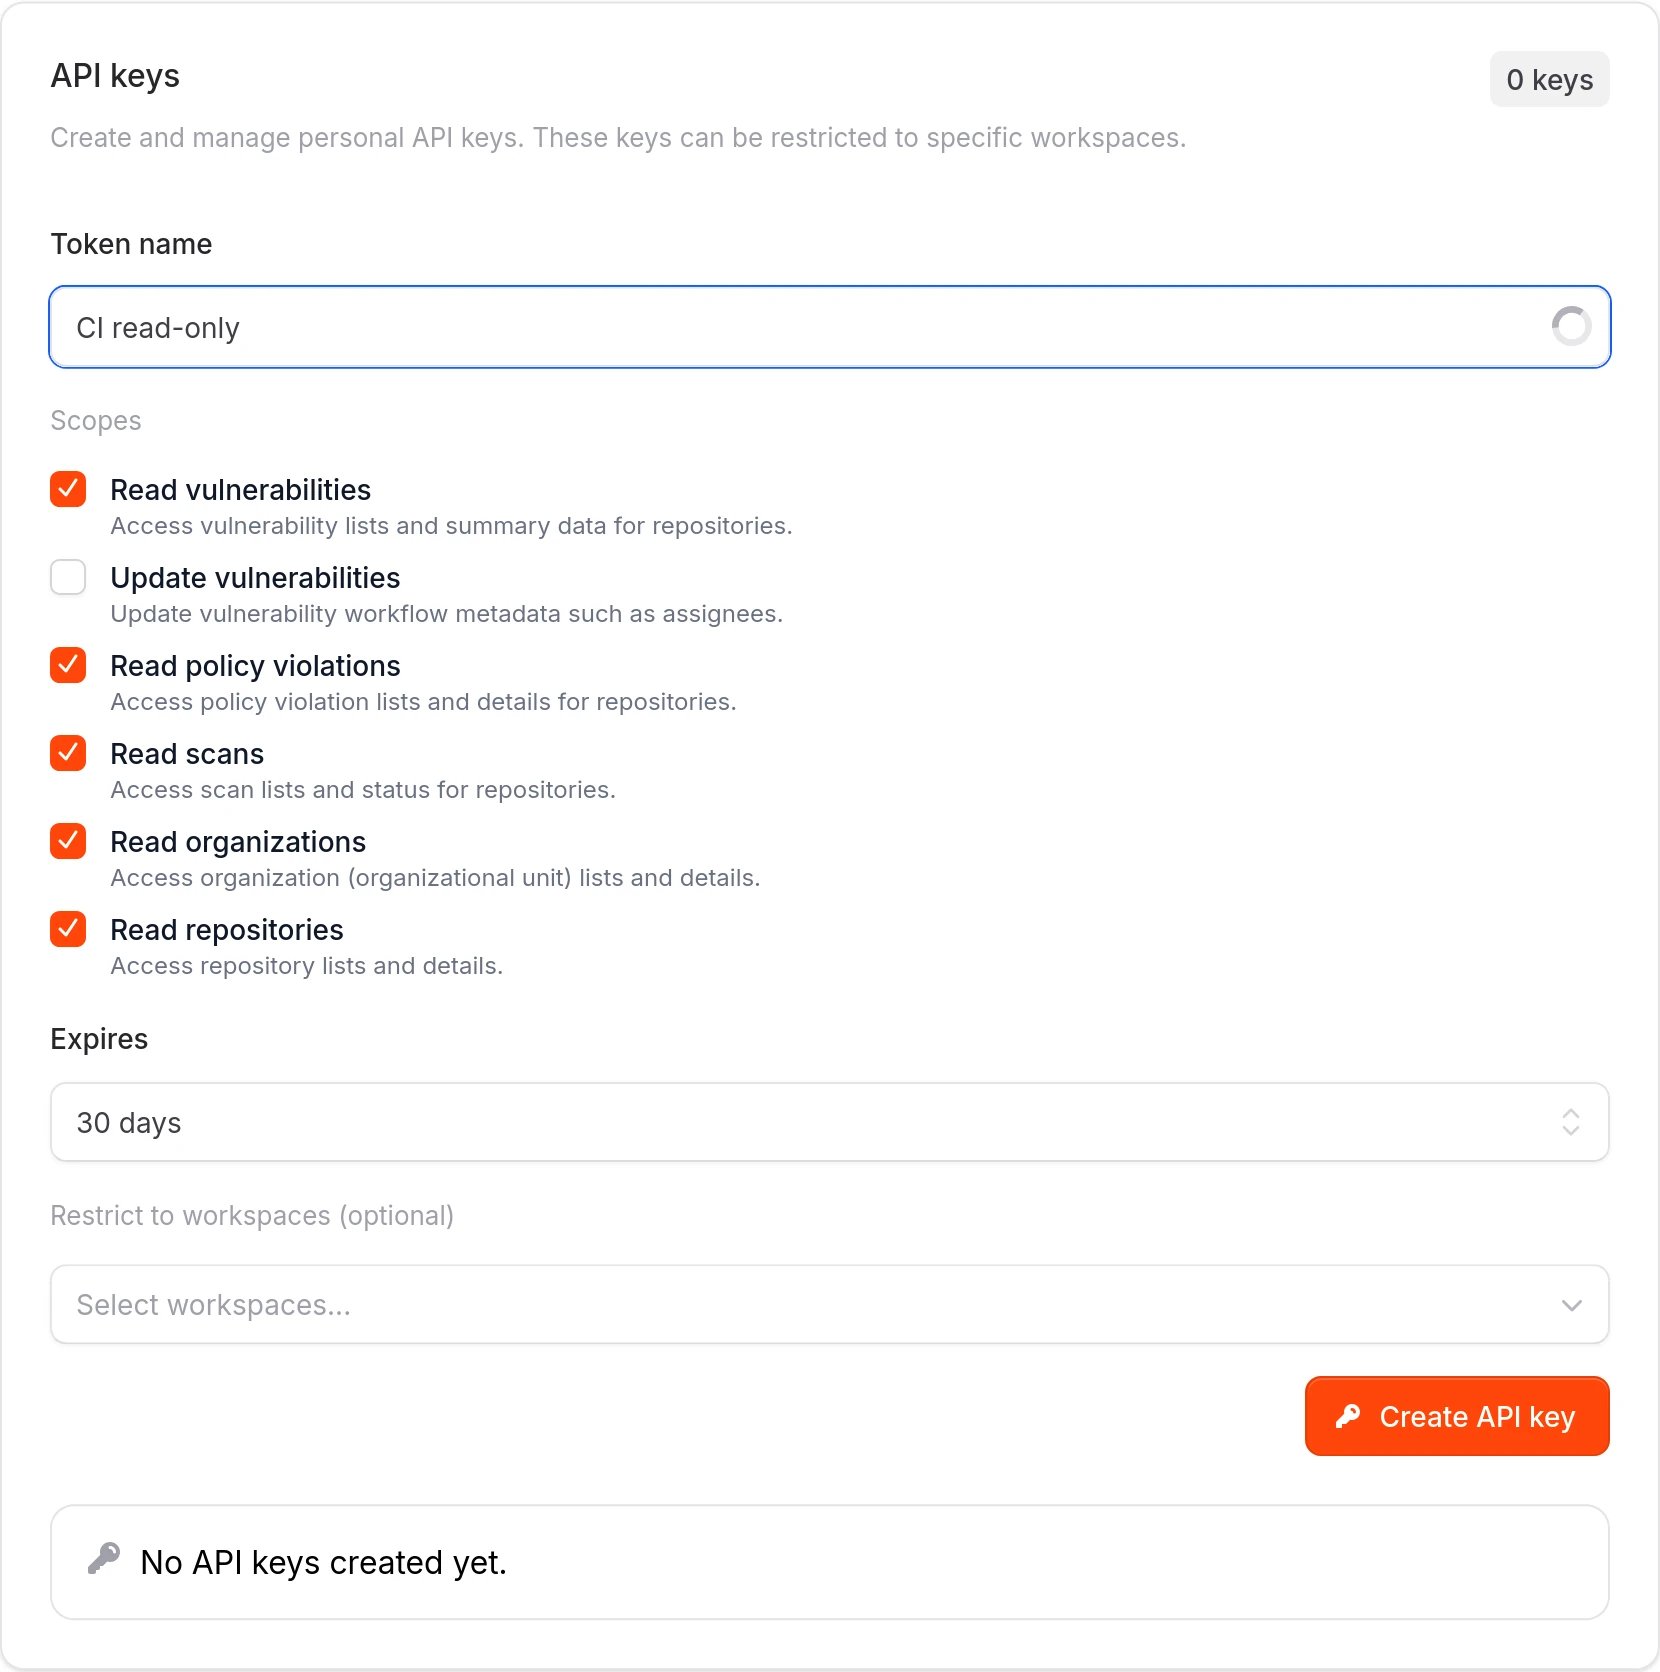 Workspace keys are automatically scoped to the current workspace.
Select **Create API key**. The key value is displayed once and cannot be retrieved later.
Workspace keys are automatically scoped to the current workspace.
Select **Create API key**. The key value is displayed once and cannot be retrieved later.
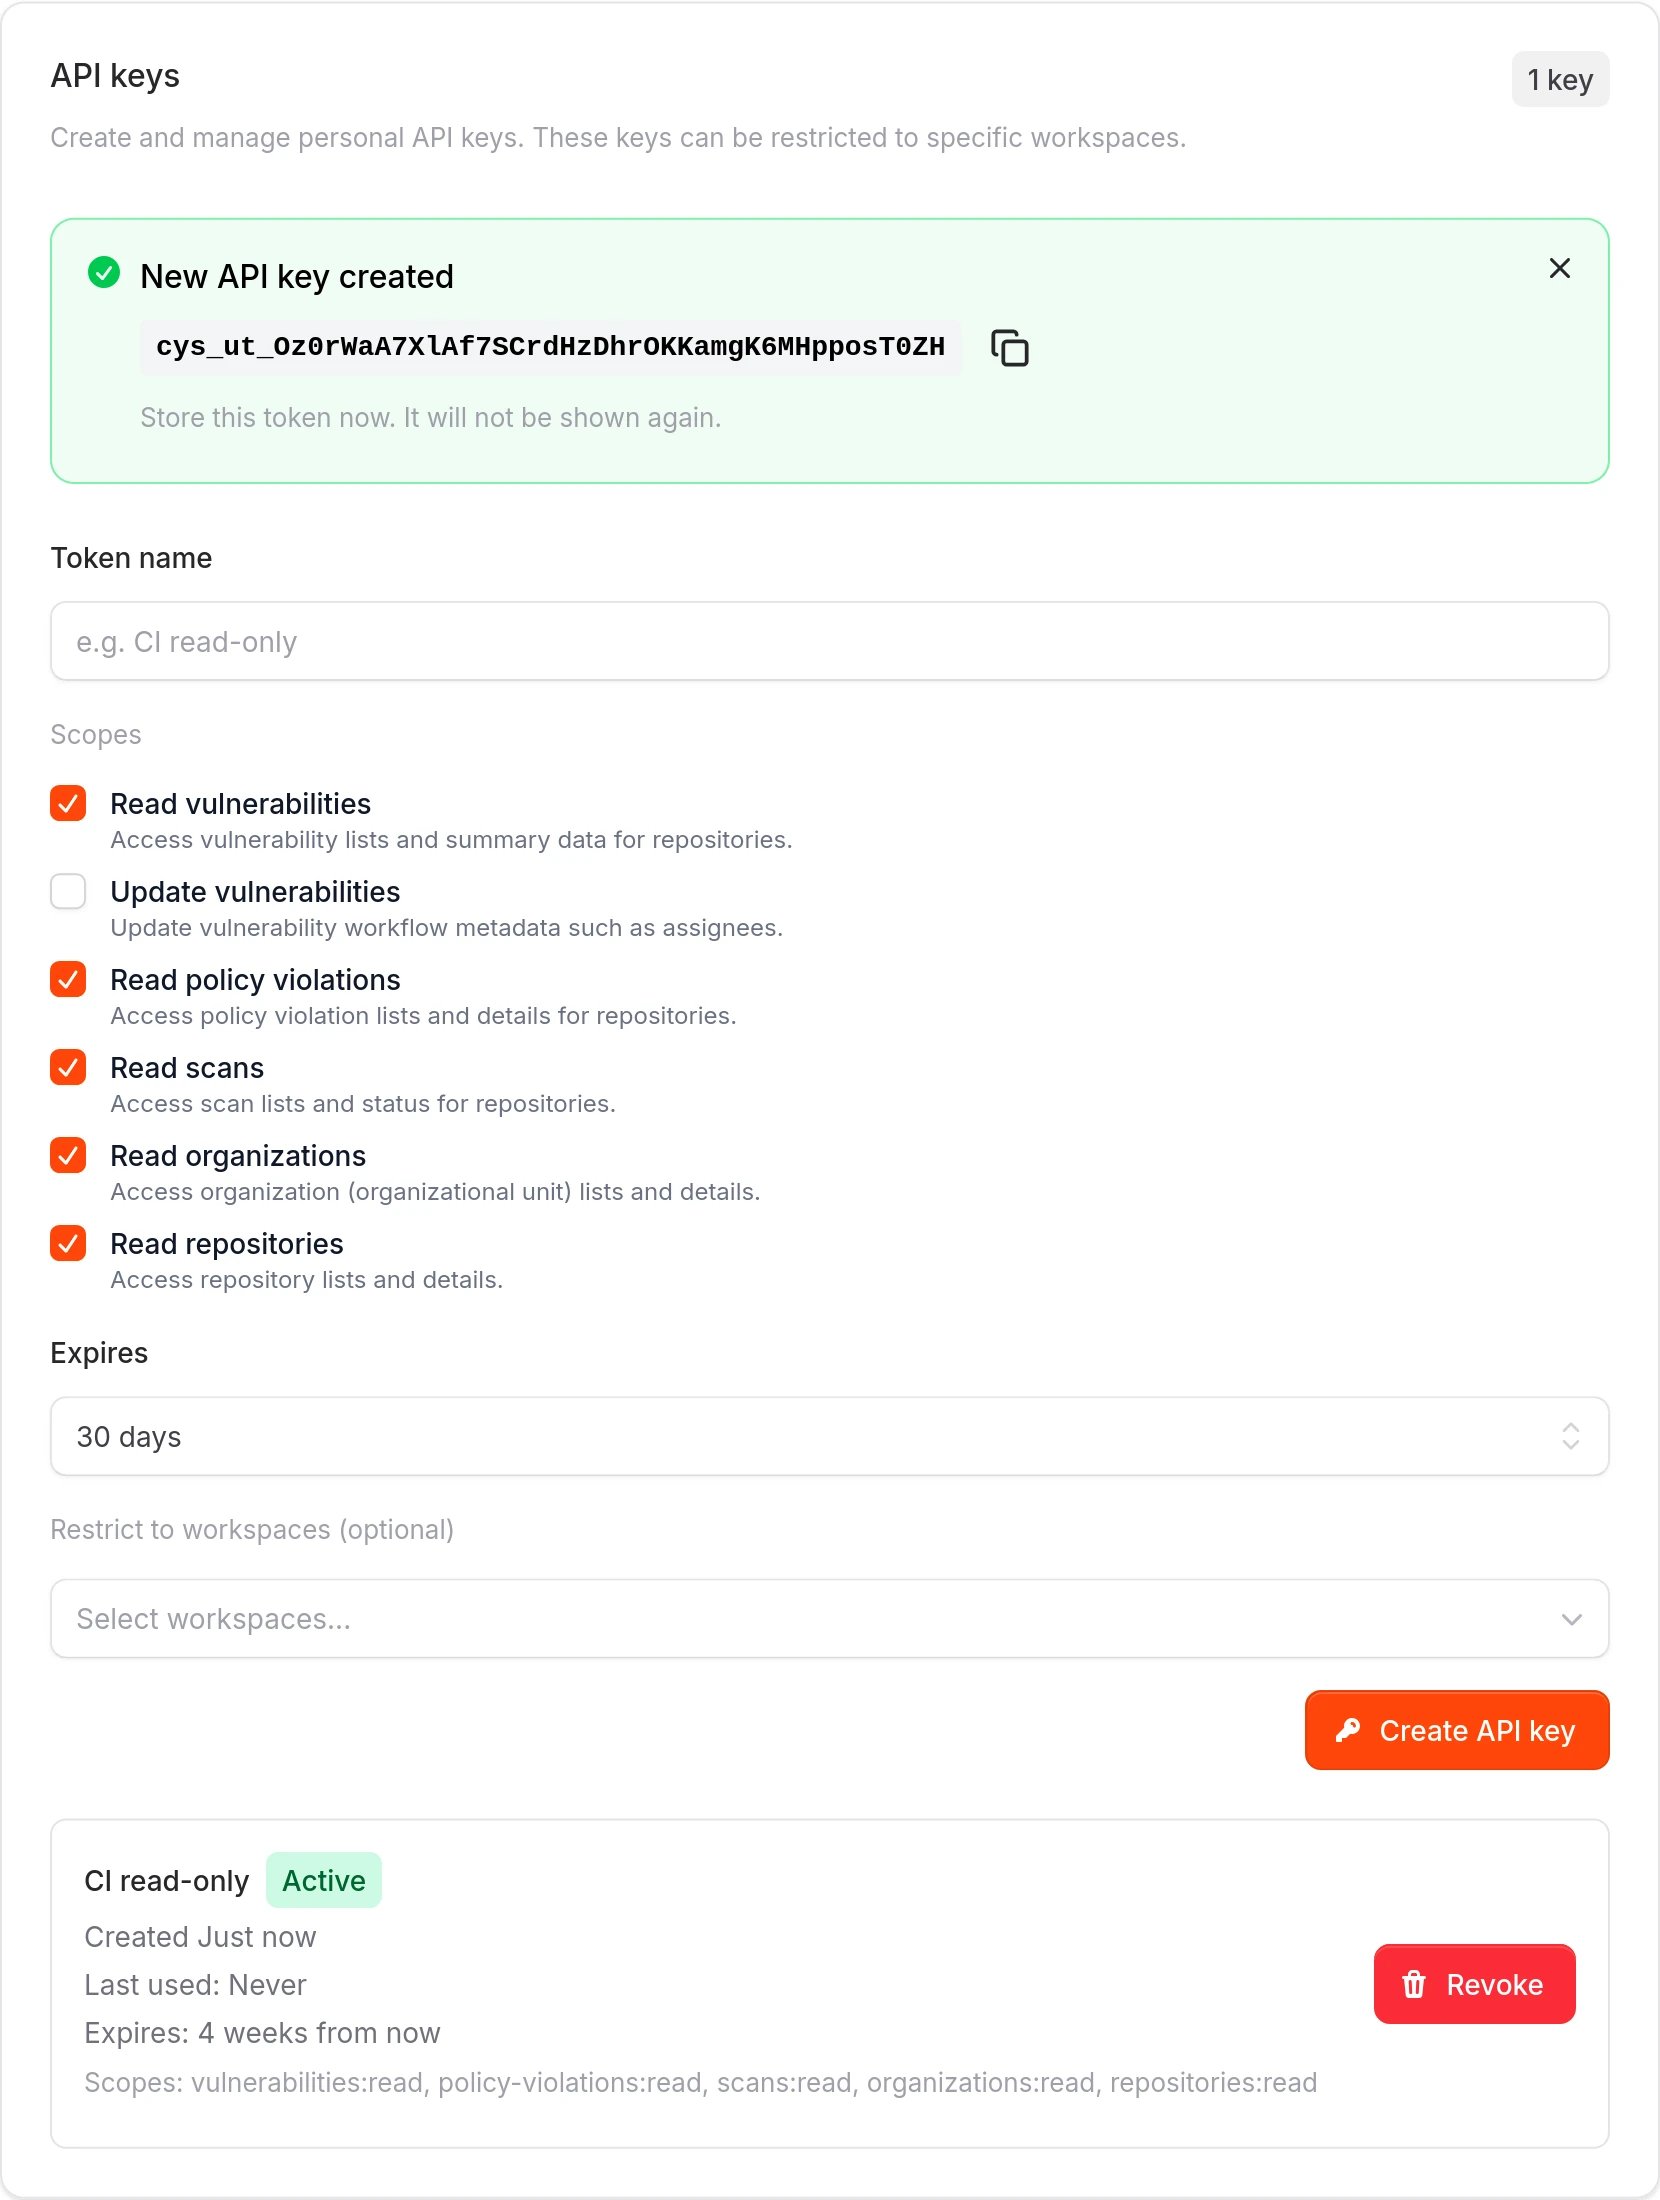 Select **Copy** to copy the key to your clipboard, then store it securely in a secrets manager or environment variable.
## Verify an API key
Use the `whoami` endpoint to confirm your key and tenant context.
Open the **Workspaces** page. The tenant slug is the short identifier used in API URLs. It appears under each workspace name, such as `e55cdd66`.
Select **Copy** to copy the key to your clipboard, then store it securely in a secrets manager or environment variable.
## Verify an API key
Use the `whoami` endpoint to confirm your key and tenant context.
Open the **Workspaces** page. The tenant slug is the short identifier used in API URLs. It appears under each workspace name, such as `e55cdd66`.
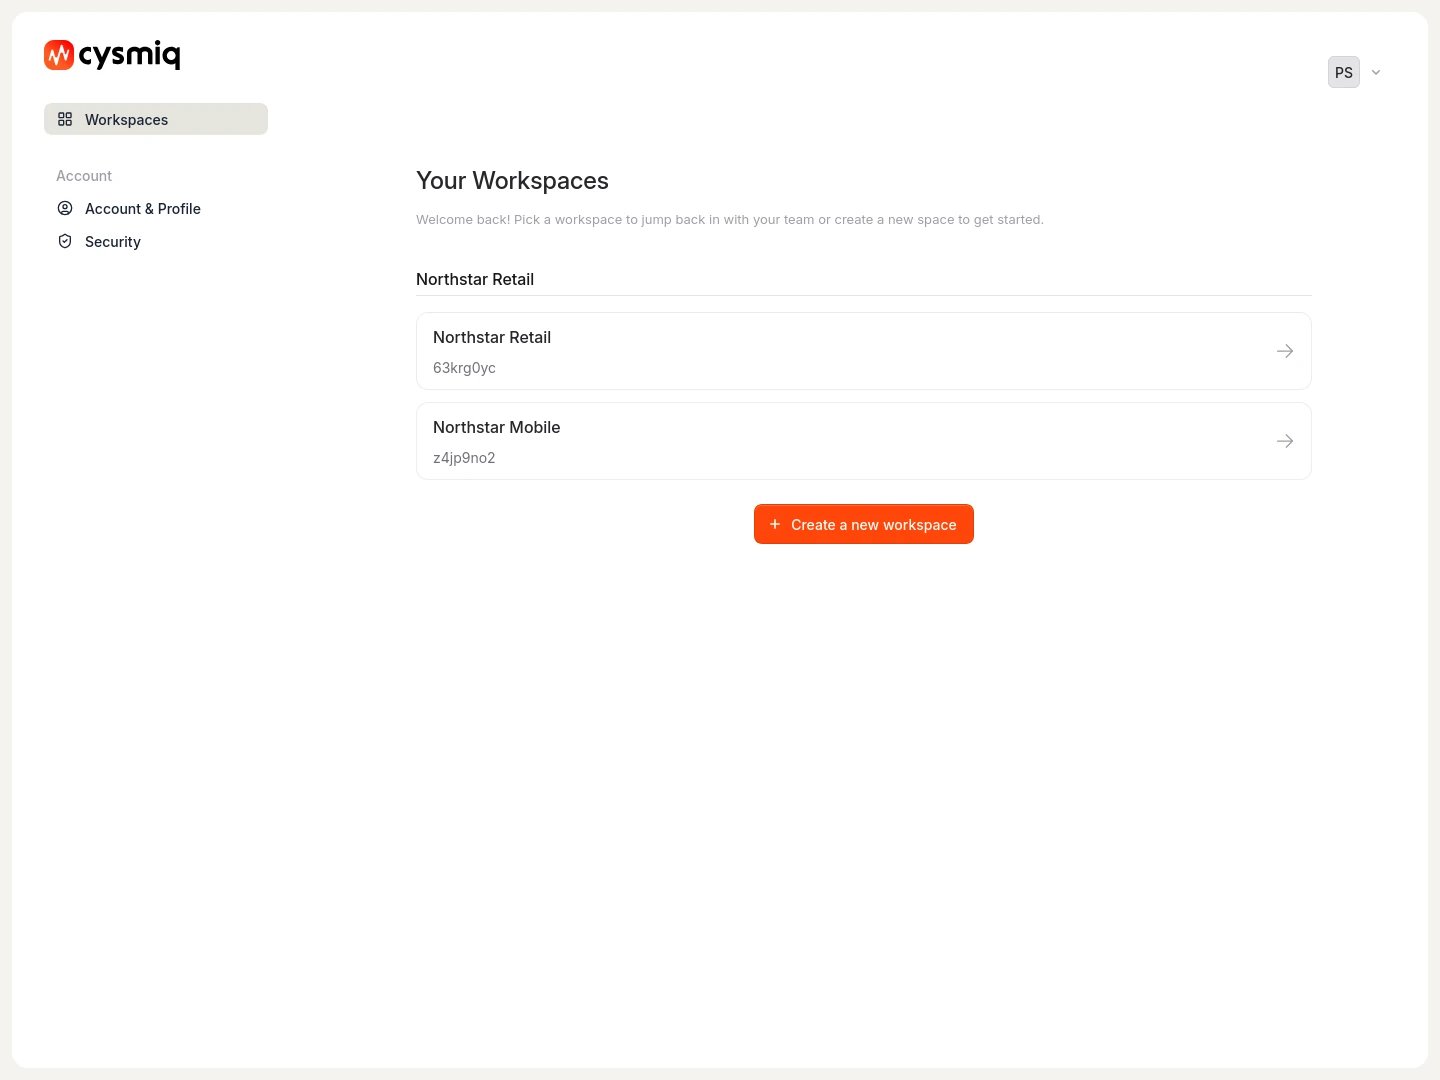 Replace `` with the value from the previous step.
For self-hosted deployments, replace `https://app.cysmiq.com` with your Cysmiq app URL.
```bash Example request theme={null}
curl -H "Accept: application/json" \
-H "Authorization: Bearer cys_tt_example1234567890" \
https://app.cysmiq.com/api/v1//whoami
```
```json Success response theme={null}
{
"actor": {
"id": "usr_01hxyzexample",
"name": "Maya Chen",
"email": "maya.chen@northstarretail.com",
"type": "user"
},
"tenant": {
"id": "t_01hxyztnt",
"slug": "e55cdd66",
"workspace": "Northstar Retail"
},
"token": {
"id": "12345",
"name": "CI read-only",
"scopes": ["vulnerabilities:read"],
"expires_at": null
}
}
```
## View and revoke keys
Created keys appear in a list below the creation form. Each key shows:
* **Name** and **Status** (Active, Expired, or Disabled)
* **Created** date and **Last used** timestamp
* **Expires** date
* **Scopes** assigned to the key
Replace `` with the value from the previous step.
For self-hosted deployments, replace `https://app.cysmiq.com` with your Cysmiq app URL.
```bash Example request theme={null}
curl -H "Accept: application/json" \
-H "Authorization: Bearer cys_tt_example1234567890" \
https://app.cysmiq.com/api/v1//whoami
```
```json Success response theme={null}
{
"actor": {
"id": "usr_01hxyzexample",
"name": "Maya Chen",
"email": "maya.chen@northstarretail.com",
"type": "user"
},
"tenant": {
"id": "t_01hxyztnt",
"slug": "e55cdd66",
"workspace": "Northstar Retail"
},
"token": {
"id": "12345",
"name": "CI read-only",
"scopes": ["vulnerabilities:read"],
"expires_at": null
}
}
```
## View and revoke keys
Created keys appear in a list below the creation form. Each key shows:
* **Name** and **Status** (Active, Expired, or Disabled)
* **Created** date and **Last used** timestamp
* **Expires** date
* **Scopes** assigned to the key
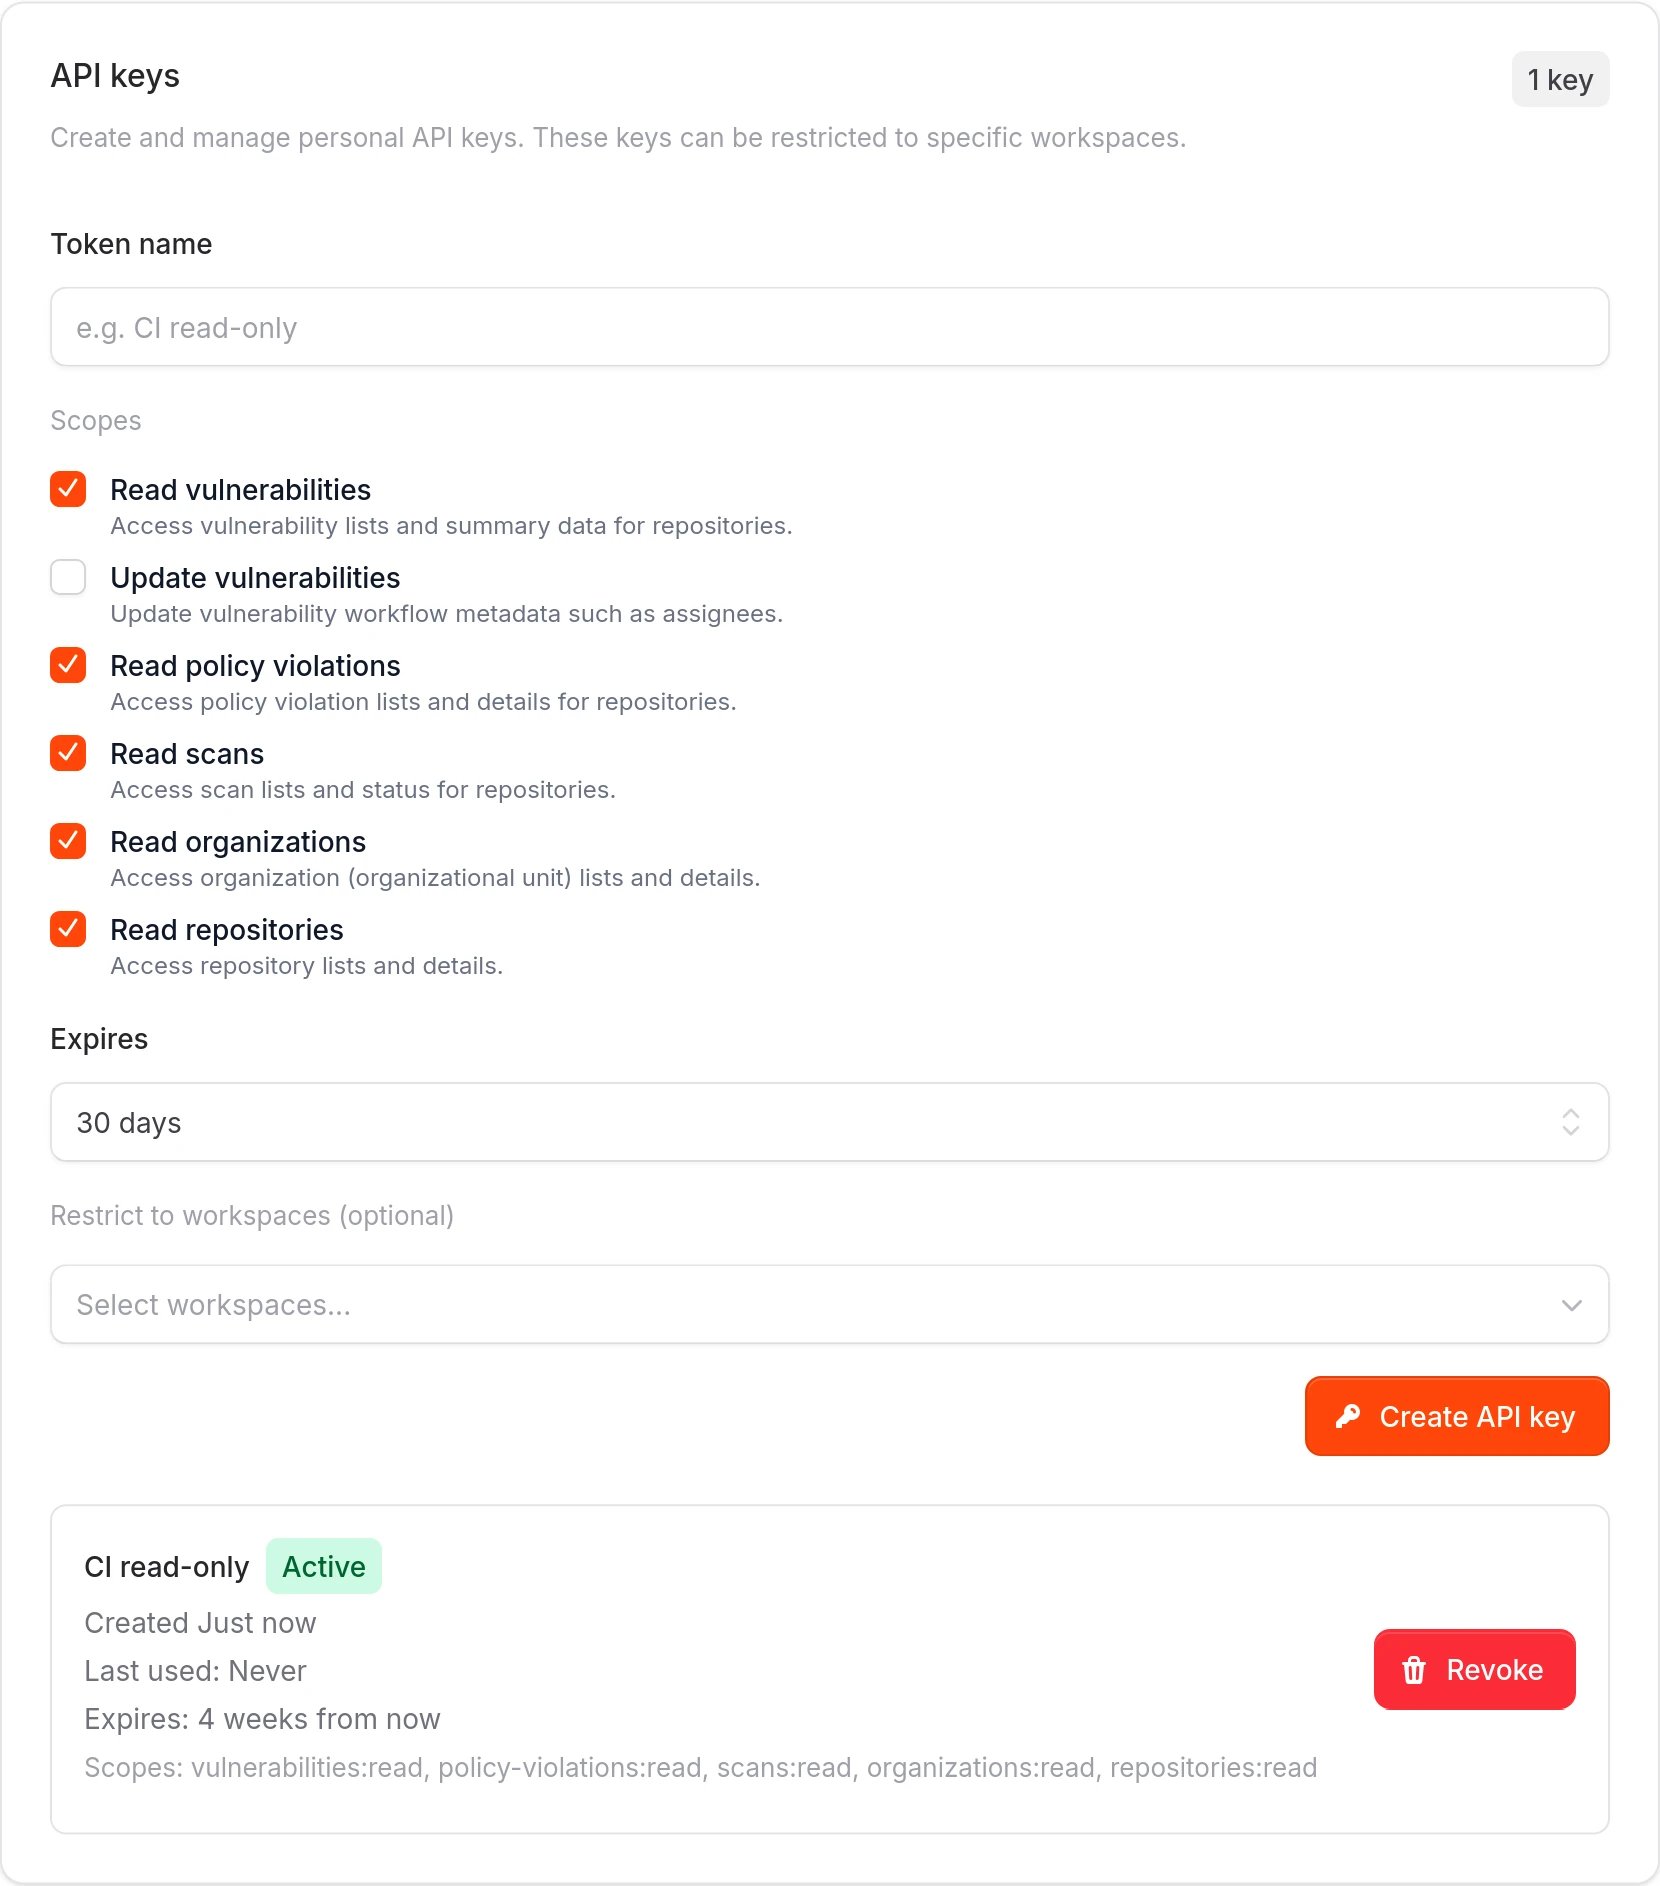 To revoke a key, select **Revoke** and confirm. Revoked keys are permanently disabled and cannot be restored.
## Related docs
* [API keys](/security-access/api-keys): Key types, scopes, and lifecycle details
* [API reference](/api-reference): Using API keys for authentication
To revoke a key, select **Revoke** and confirm. Revoked keys are permanently disabled and cannot be restored.
## Related docs
* [API keys](/security-access/api-keys): Key types, scopes, and lifecycle details
* [API reference](/api-reference): Using API keys for authentication