Prerequisites
- Owner role in the workspace
View members
Navigate to Settings → Members to see all workspace members.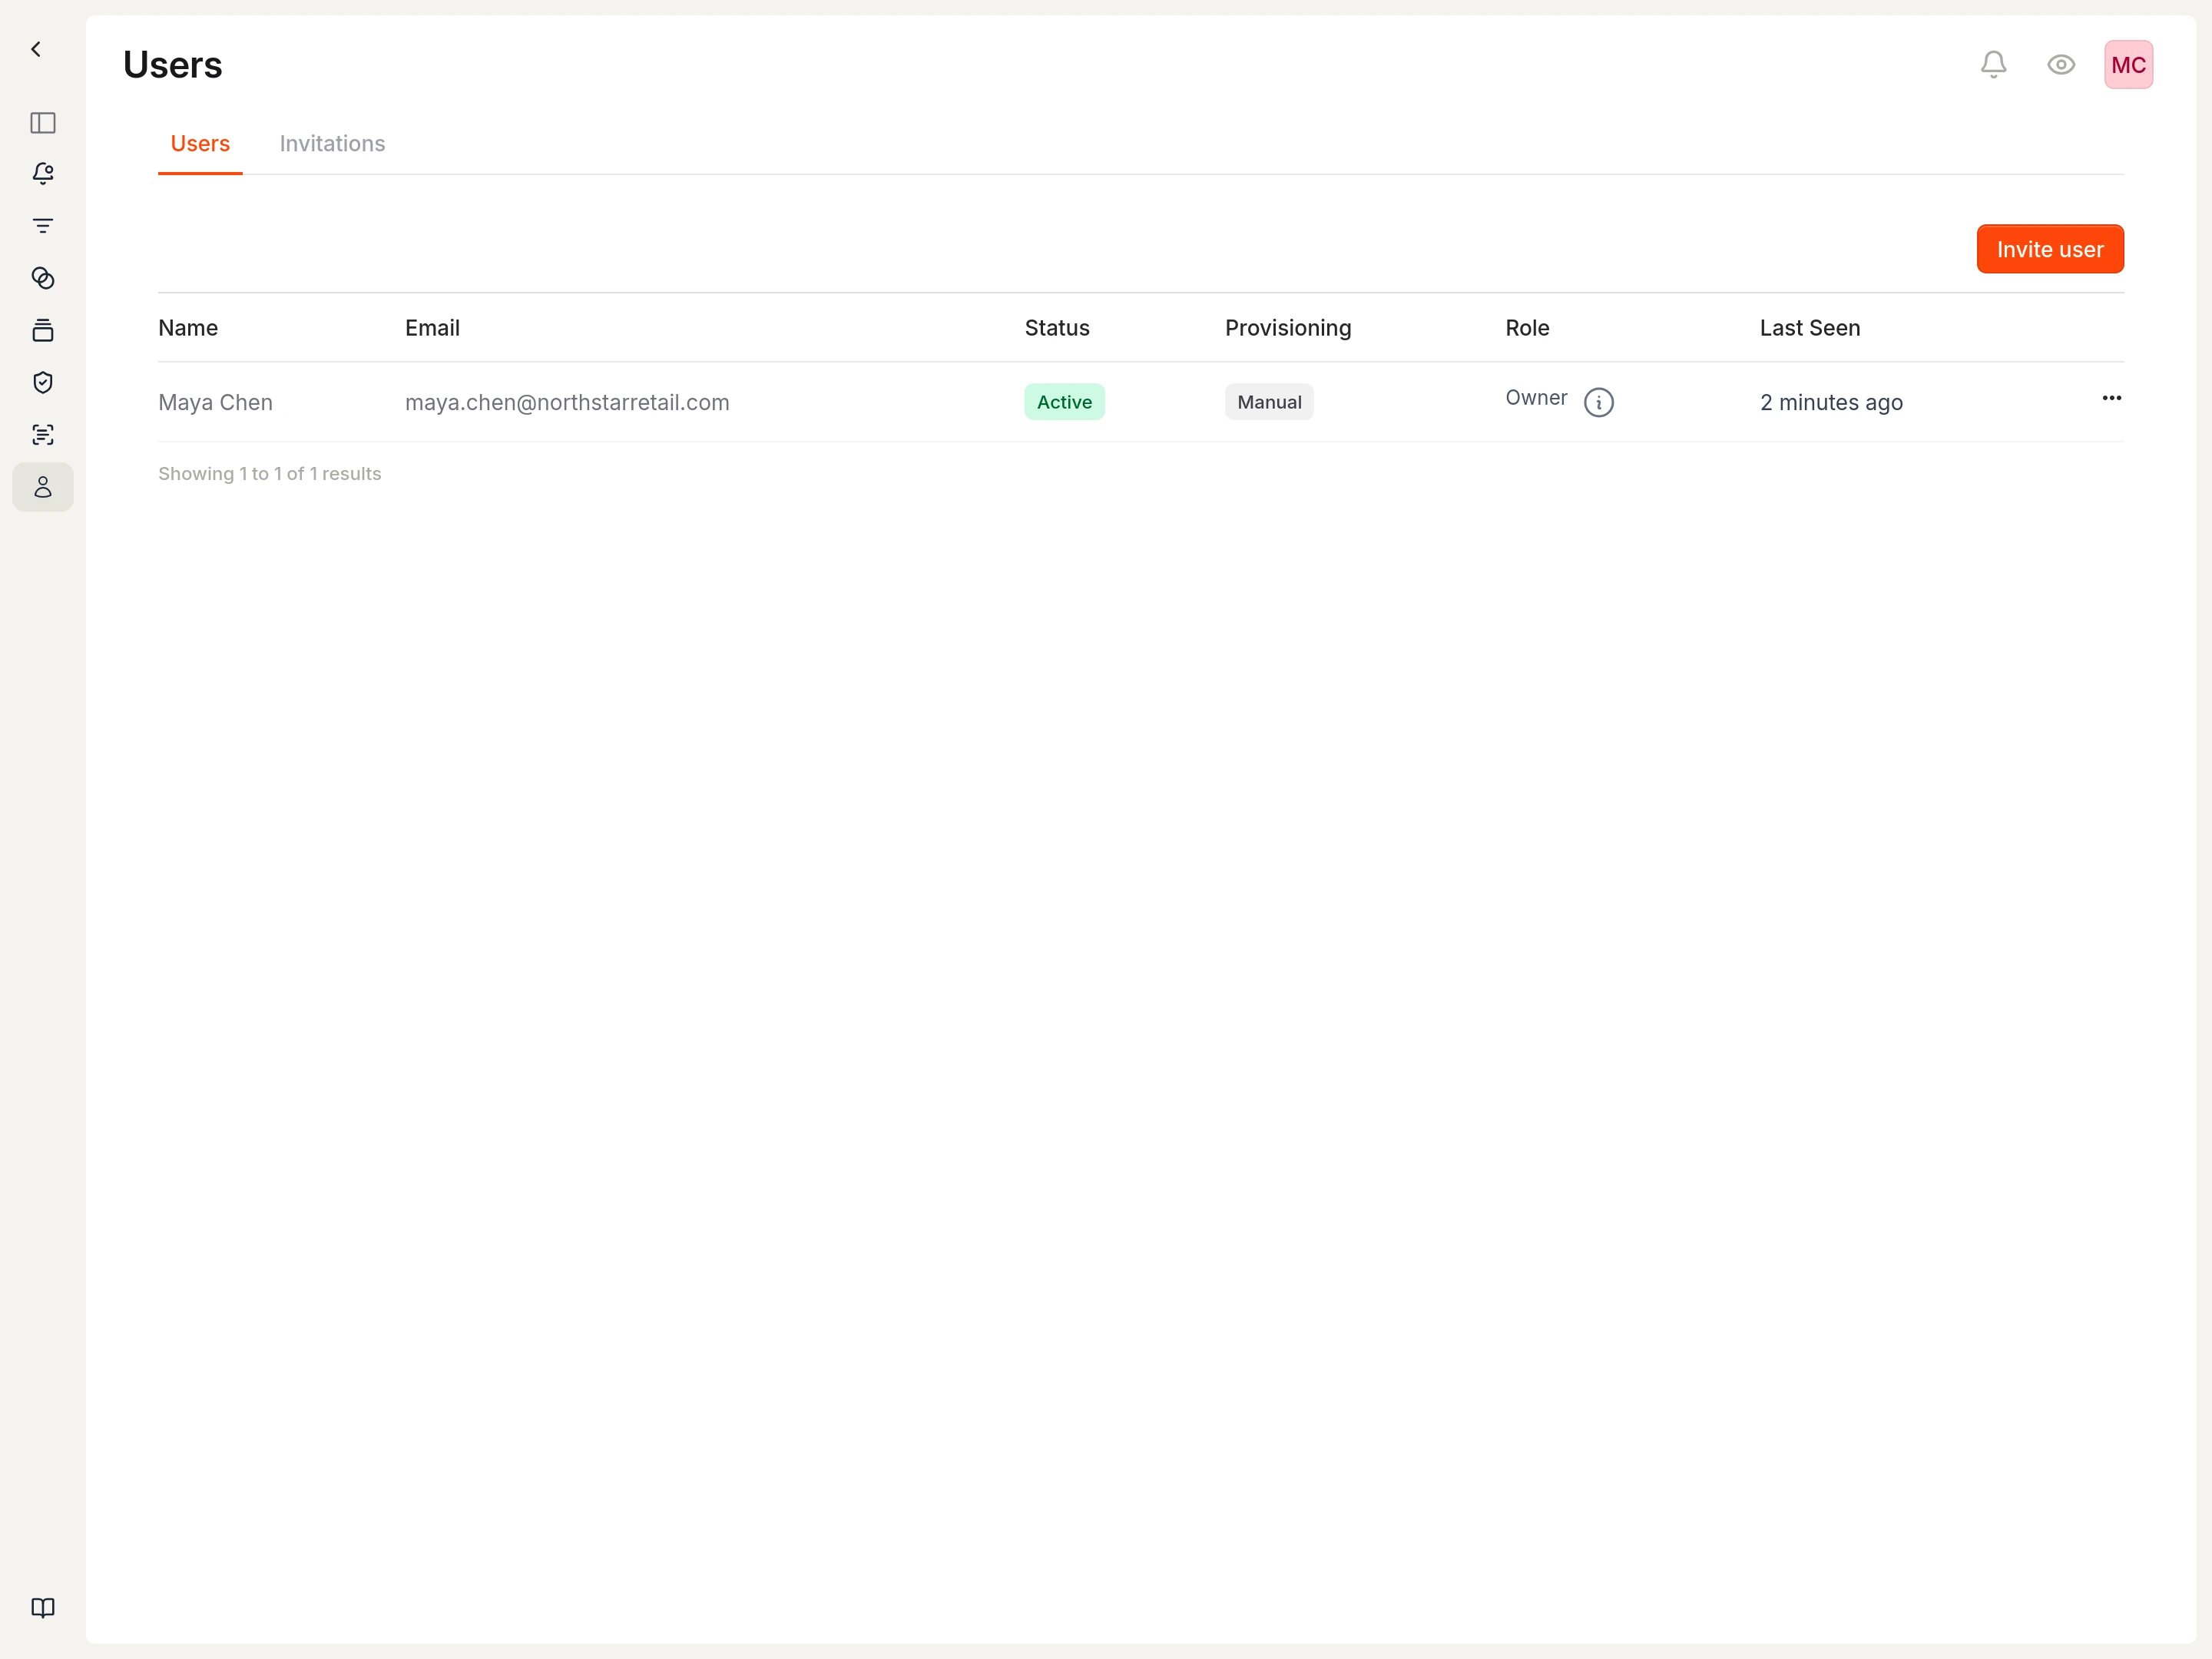
- Name: Display name from the user’s profile
- Email: The email address used to sign in
- Status: Active (can access workspace) or Pending (invited but not yet signed in)
- Provisioning: How the user was added (Manual or SSO)
- Role: The user’s permission level
- Last Seen: When the user last accessed the workspace
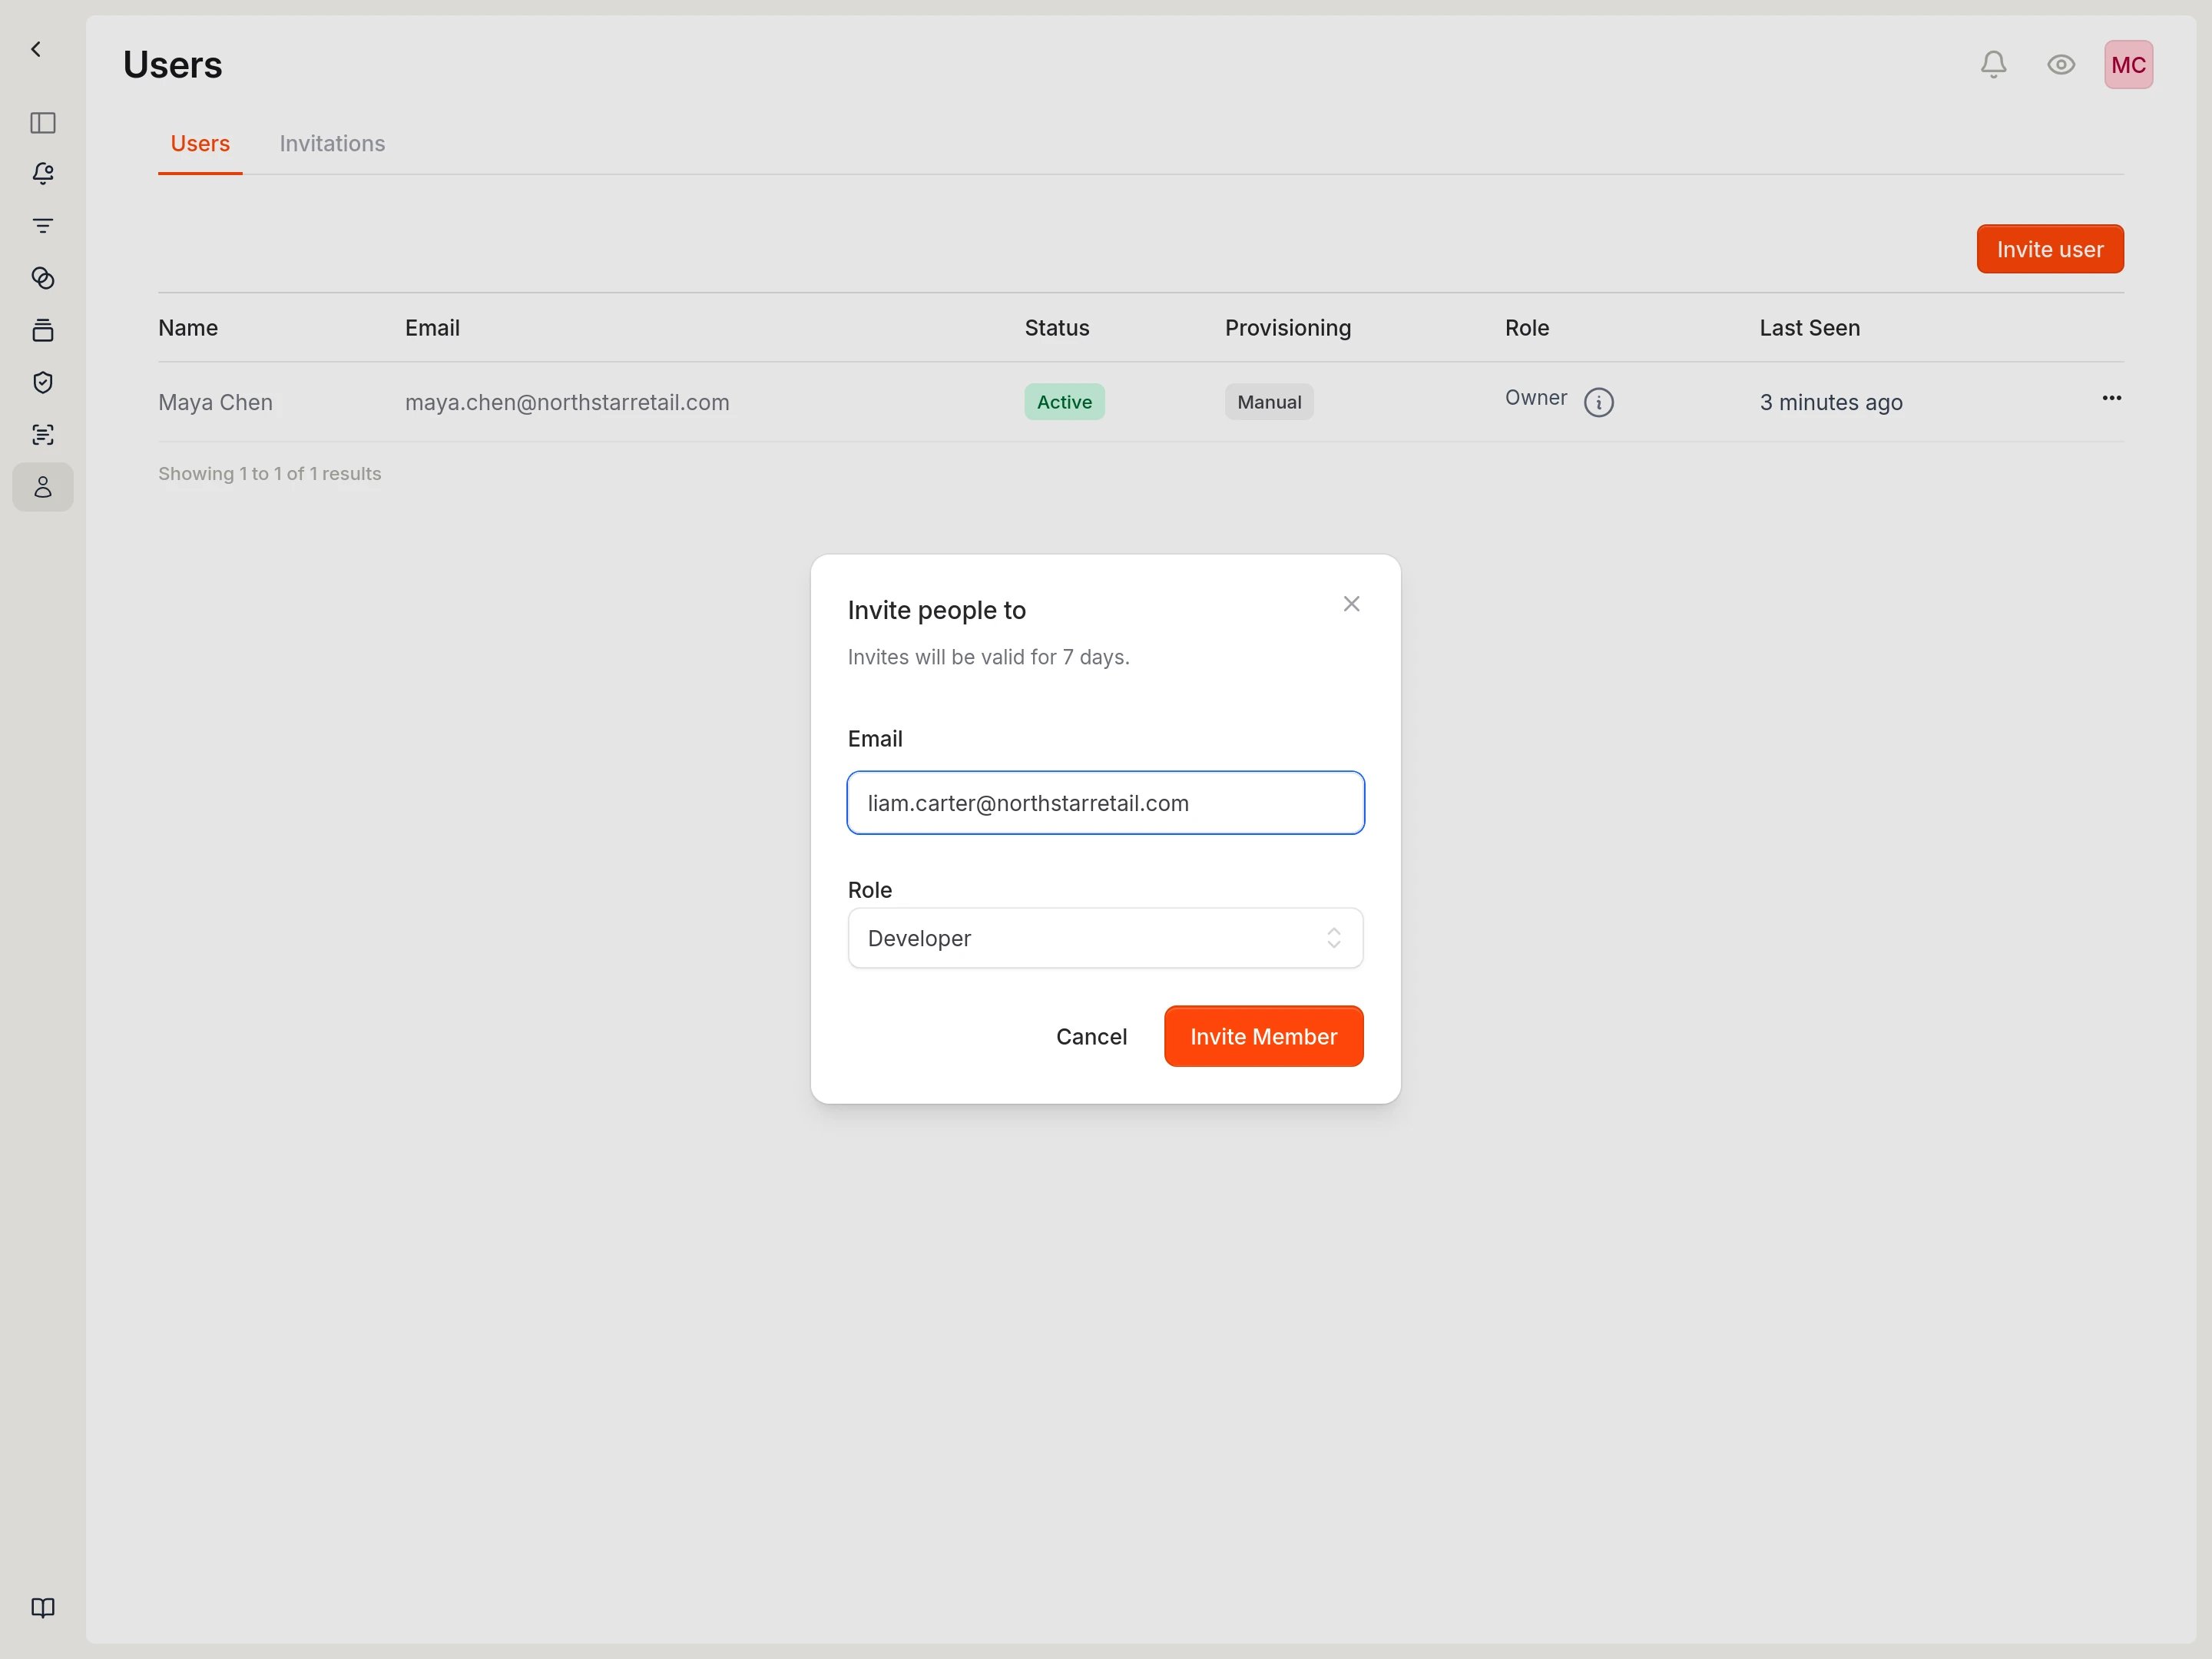
Invite a member
- Select Invite user to open the invitation form.

- Enter the user’s email address.
- Select a role from the dropdown.
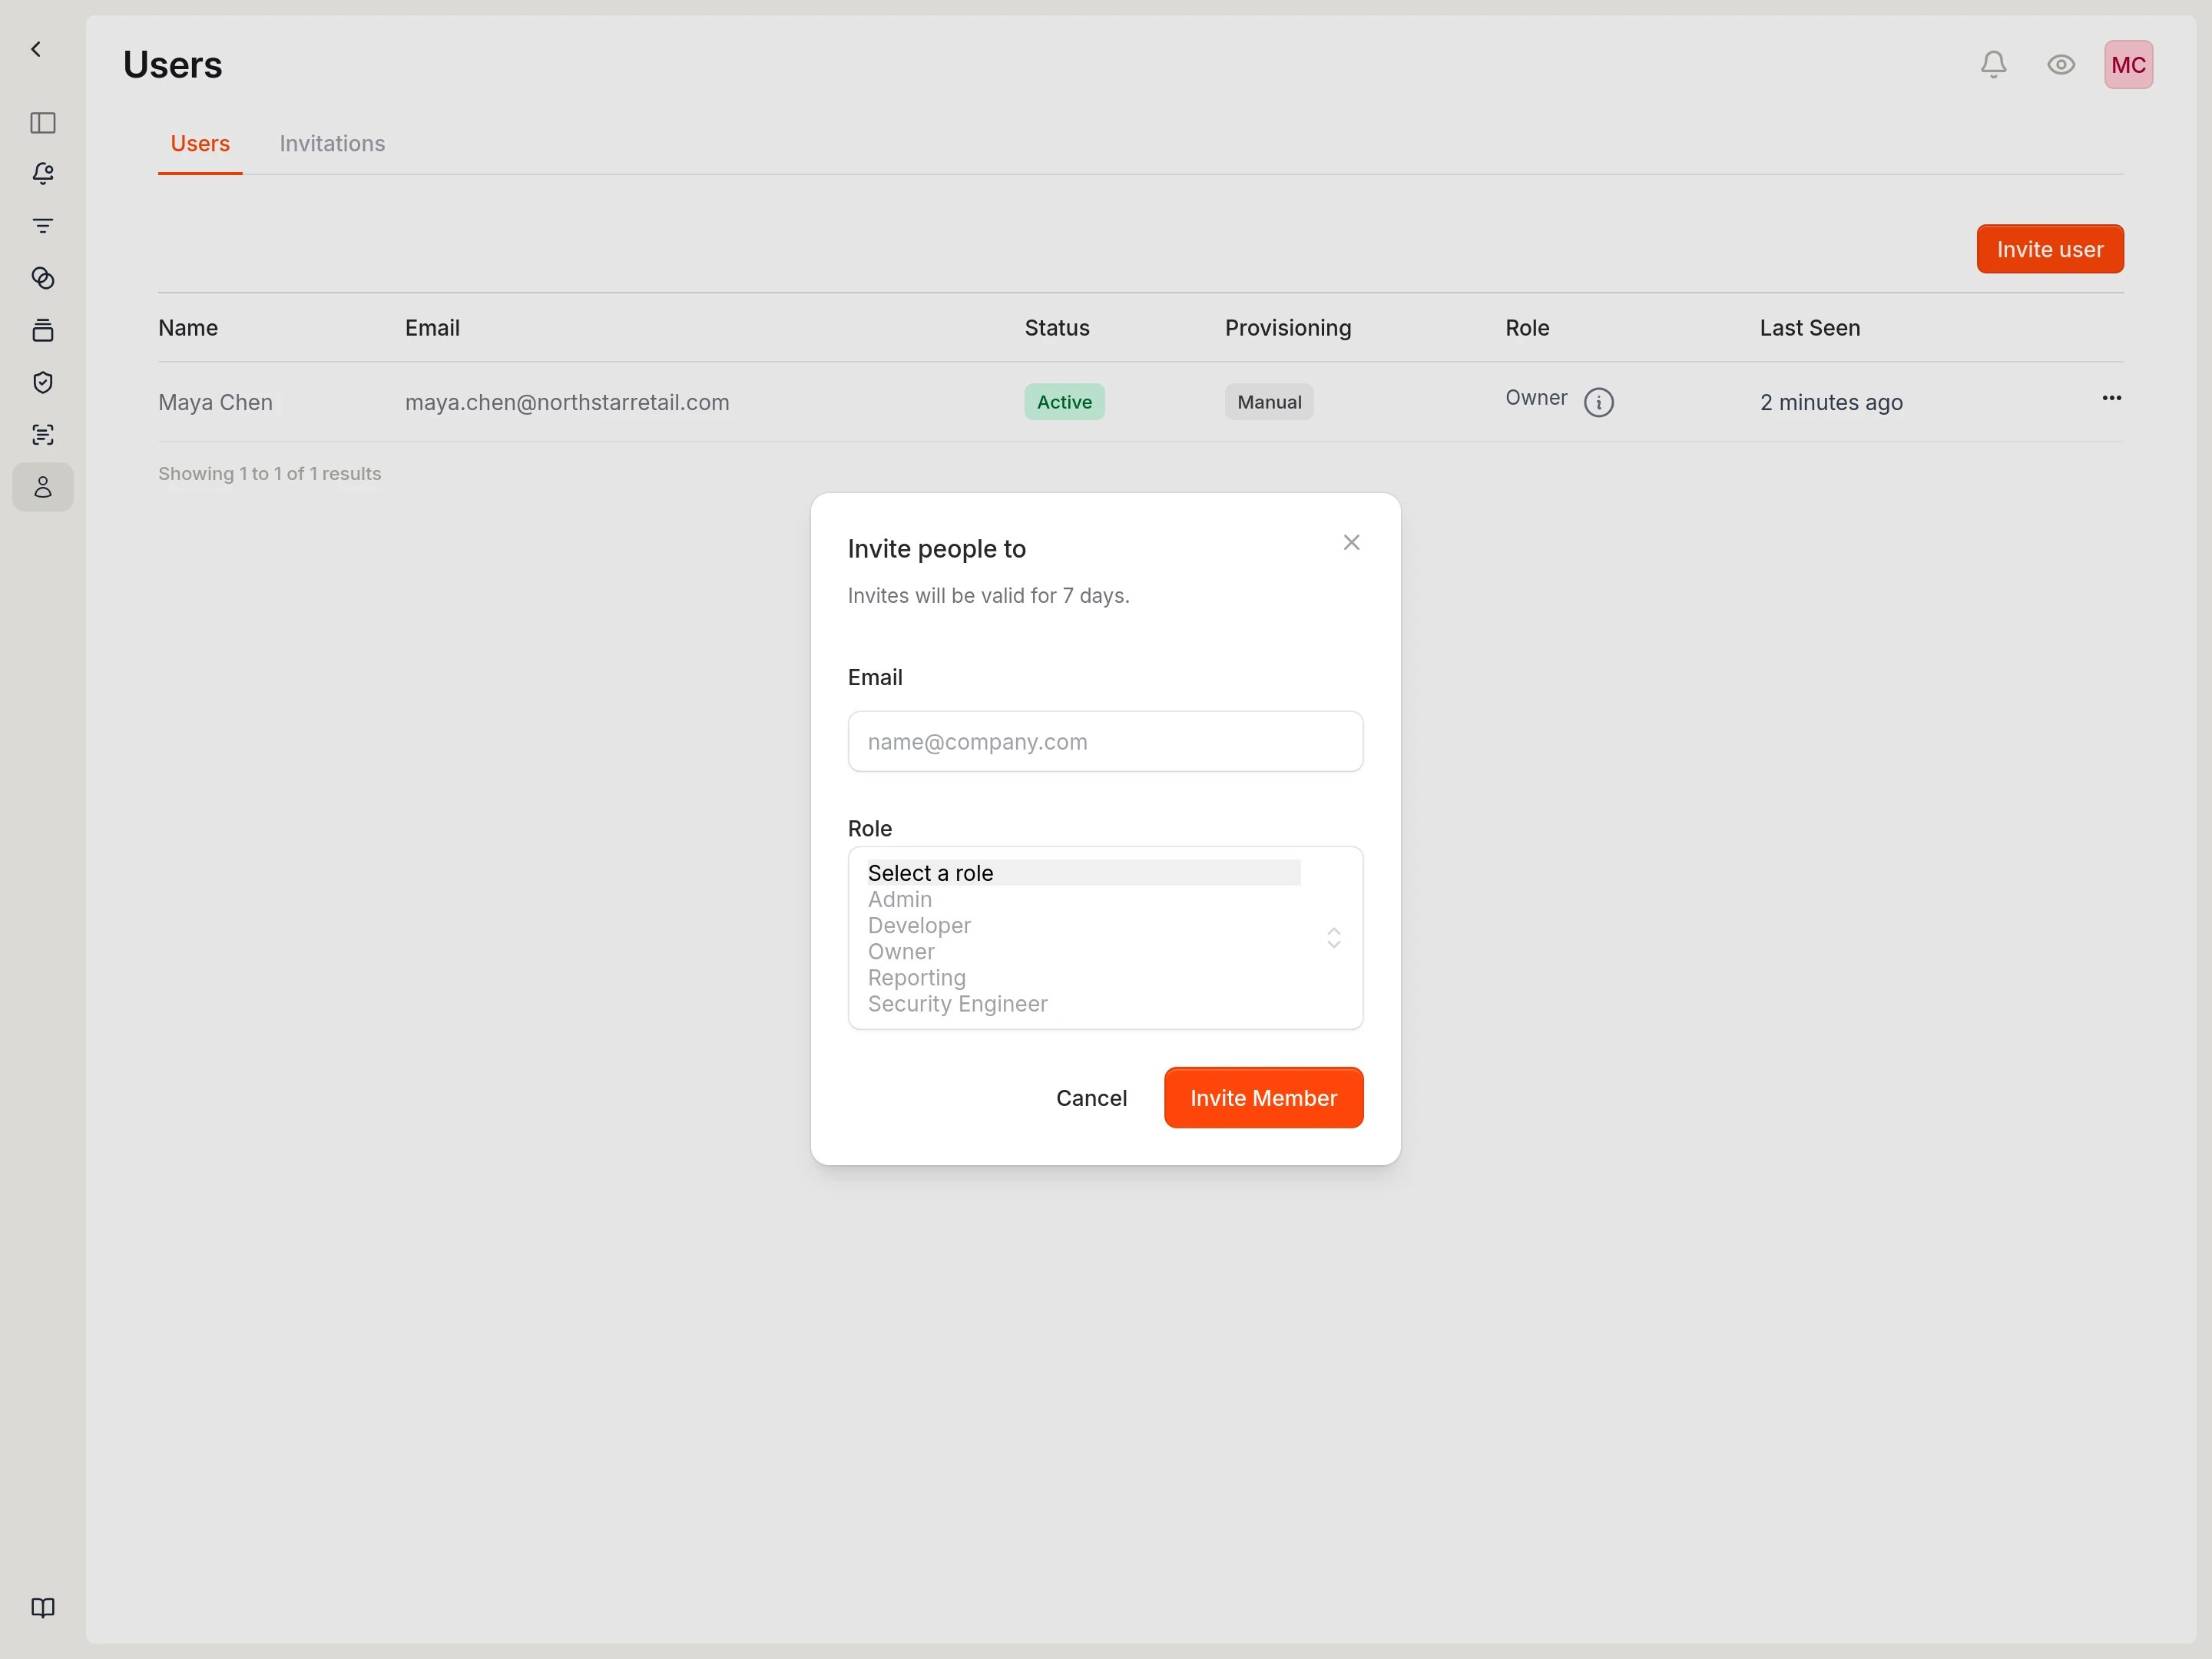
- Select Invite Member to send the invitation.
Available roles
| Role | Description |
|---|---|
| Owner | Full access including billing and workspace deletion |
| Admin | Manage repositories, vulnerabilities, and reports. Cannot manage members or billing. |
| Security Engineer | Triage vulnerabilities and manage findings |
| Developer | View vulnerabilities and create tickets |
| Reporting | Read-only access to dashboards and reports |
Track pending invitations
Select the Invitations tab to view pending invitations.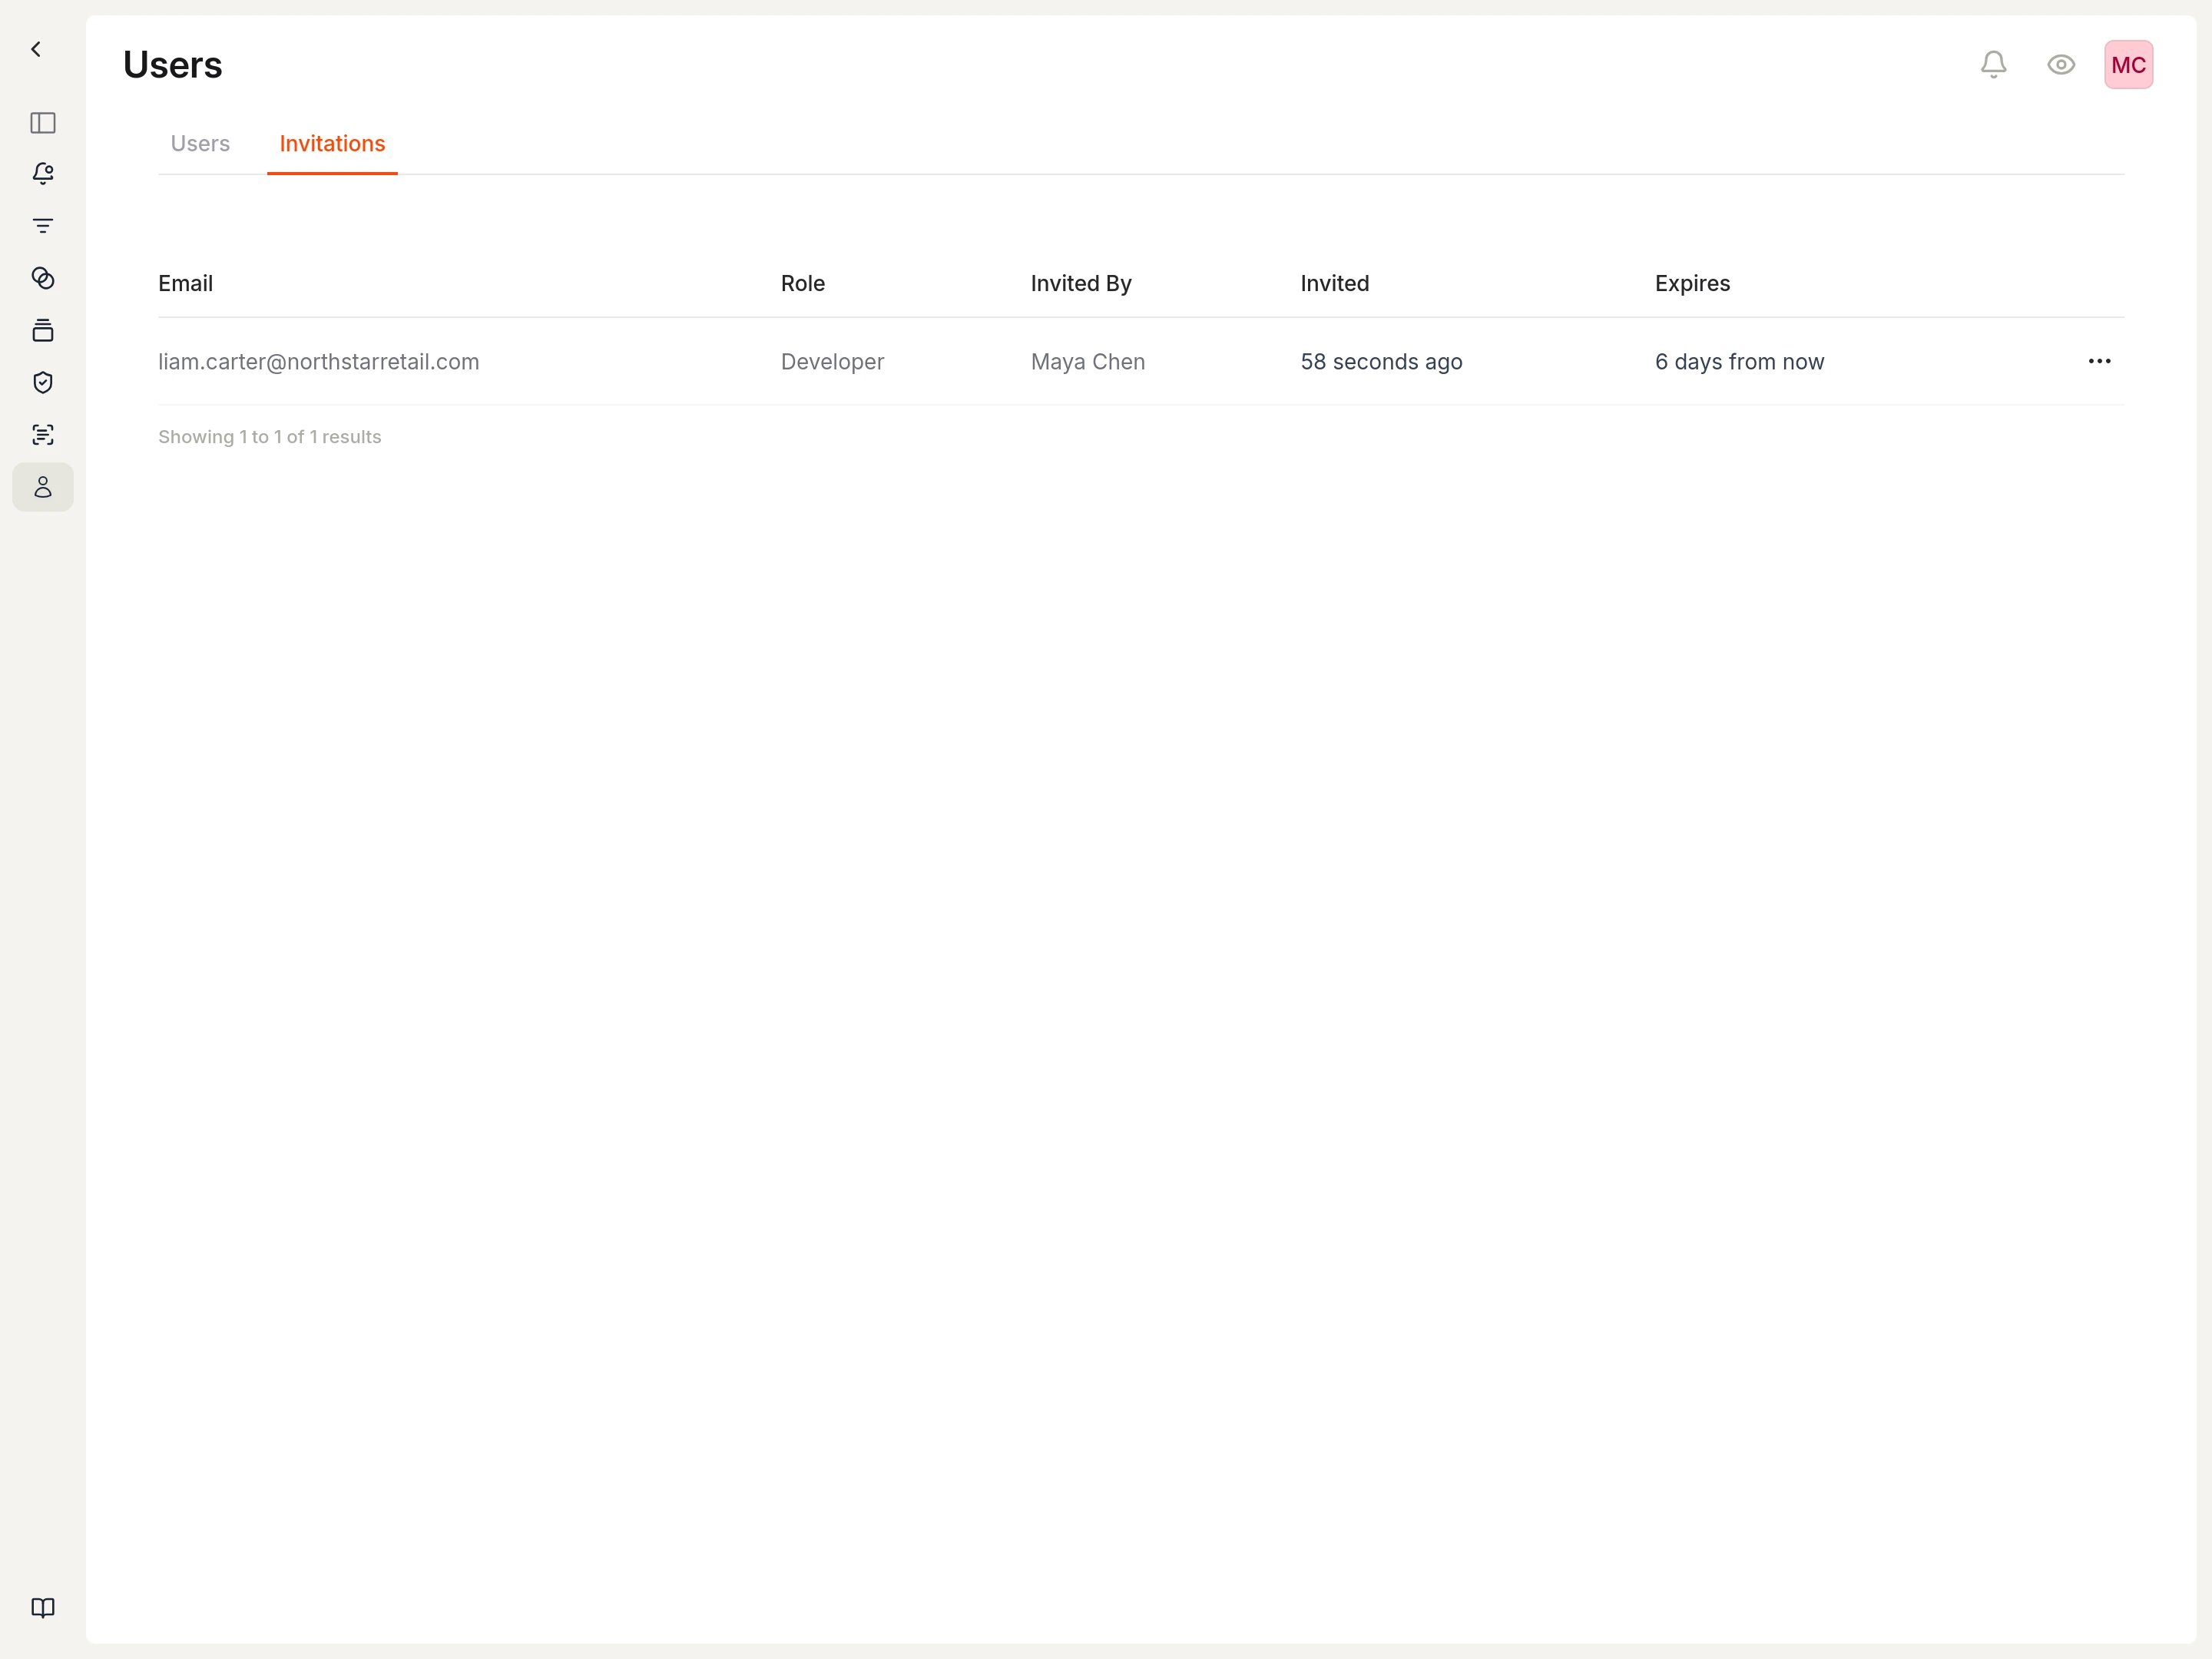
- See who sent each invitation
- Check when invitations expire
- Resend or revoke invitations using the actions menu
Manage a member
Select the actions menu (three dots) on a member row to access management options.
Change a member’s role
- Find the member in the Users list.
- Select the role dropdown in their row.
- Choose the new role.
Suspend a member
Suspending a member revokes their access without deleting their account. Their vulnerability assignments and history are preserved.- Find the member in the Users list.
- Select the actions menu (three dots) in their row.
- Select Suspend.
Remove a member
Removing a member completely removes them from the workspace.- Find the member in the Users list.
- Select the actions menu (three dots) in their row.
- Select Remove from Workspace.
Related
- Workspaces: Understanding workspace isolation
- Security settings: Configure SSO and access policies