Connect a repository, understand the first actionable finding, apply a fix, and verify the result with a follow-up scan.
Use this journey to move from a new workspace to a verified remediation. It links the setup, scanning, triage, and collaboration steps into one complete workflow.
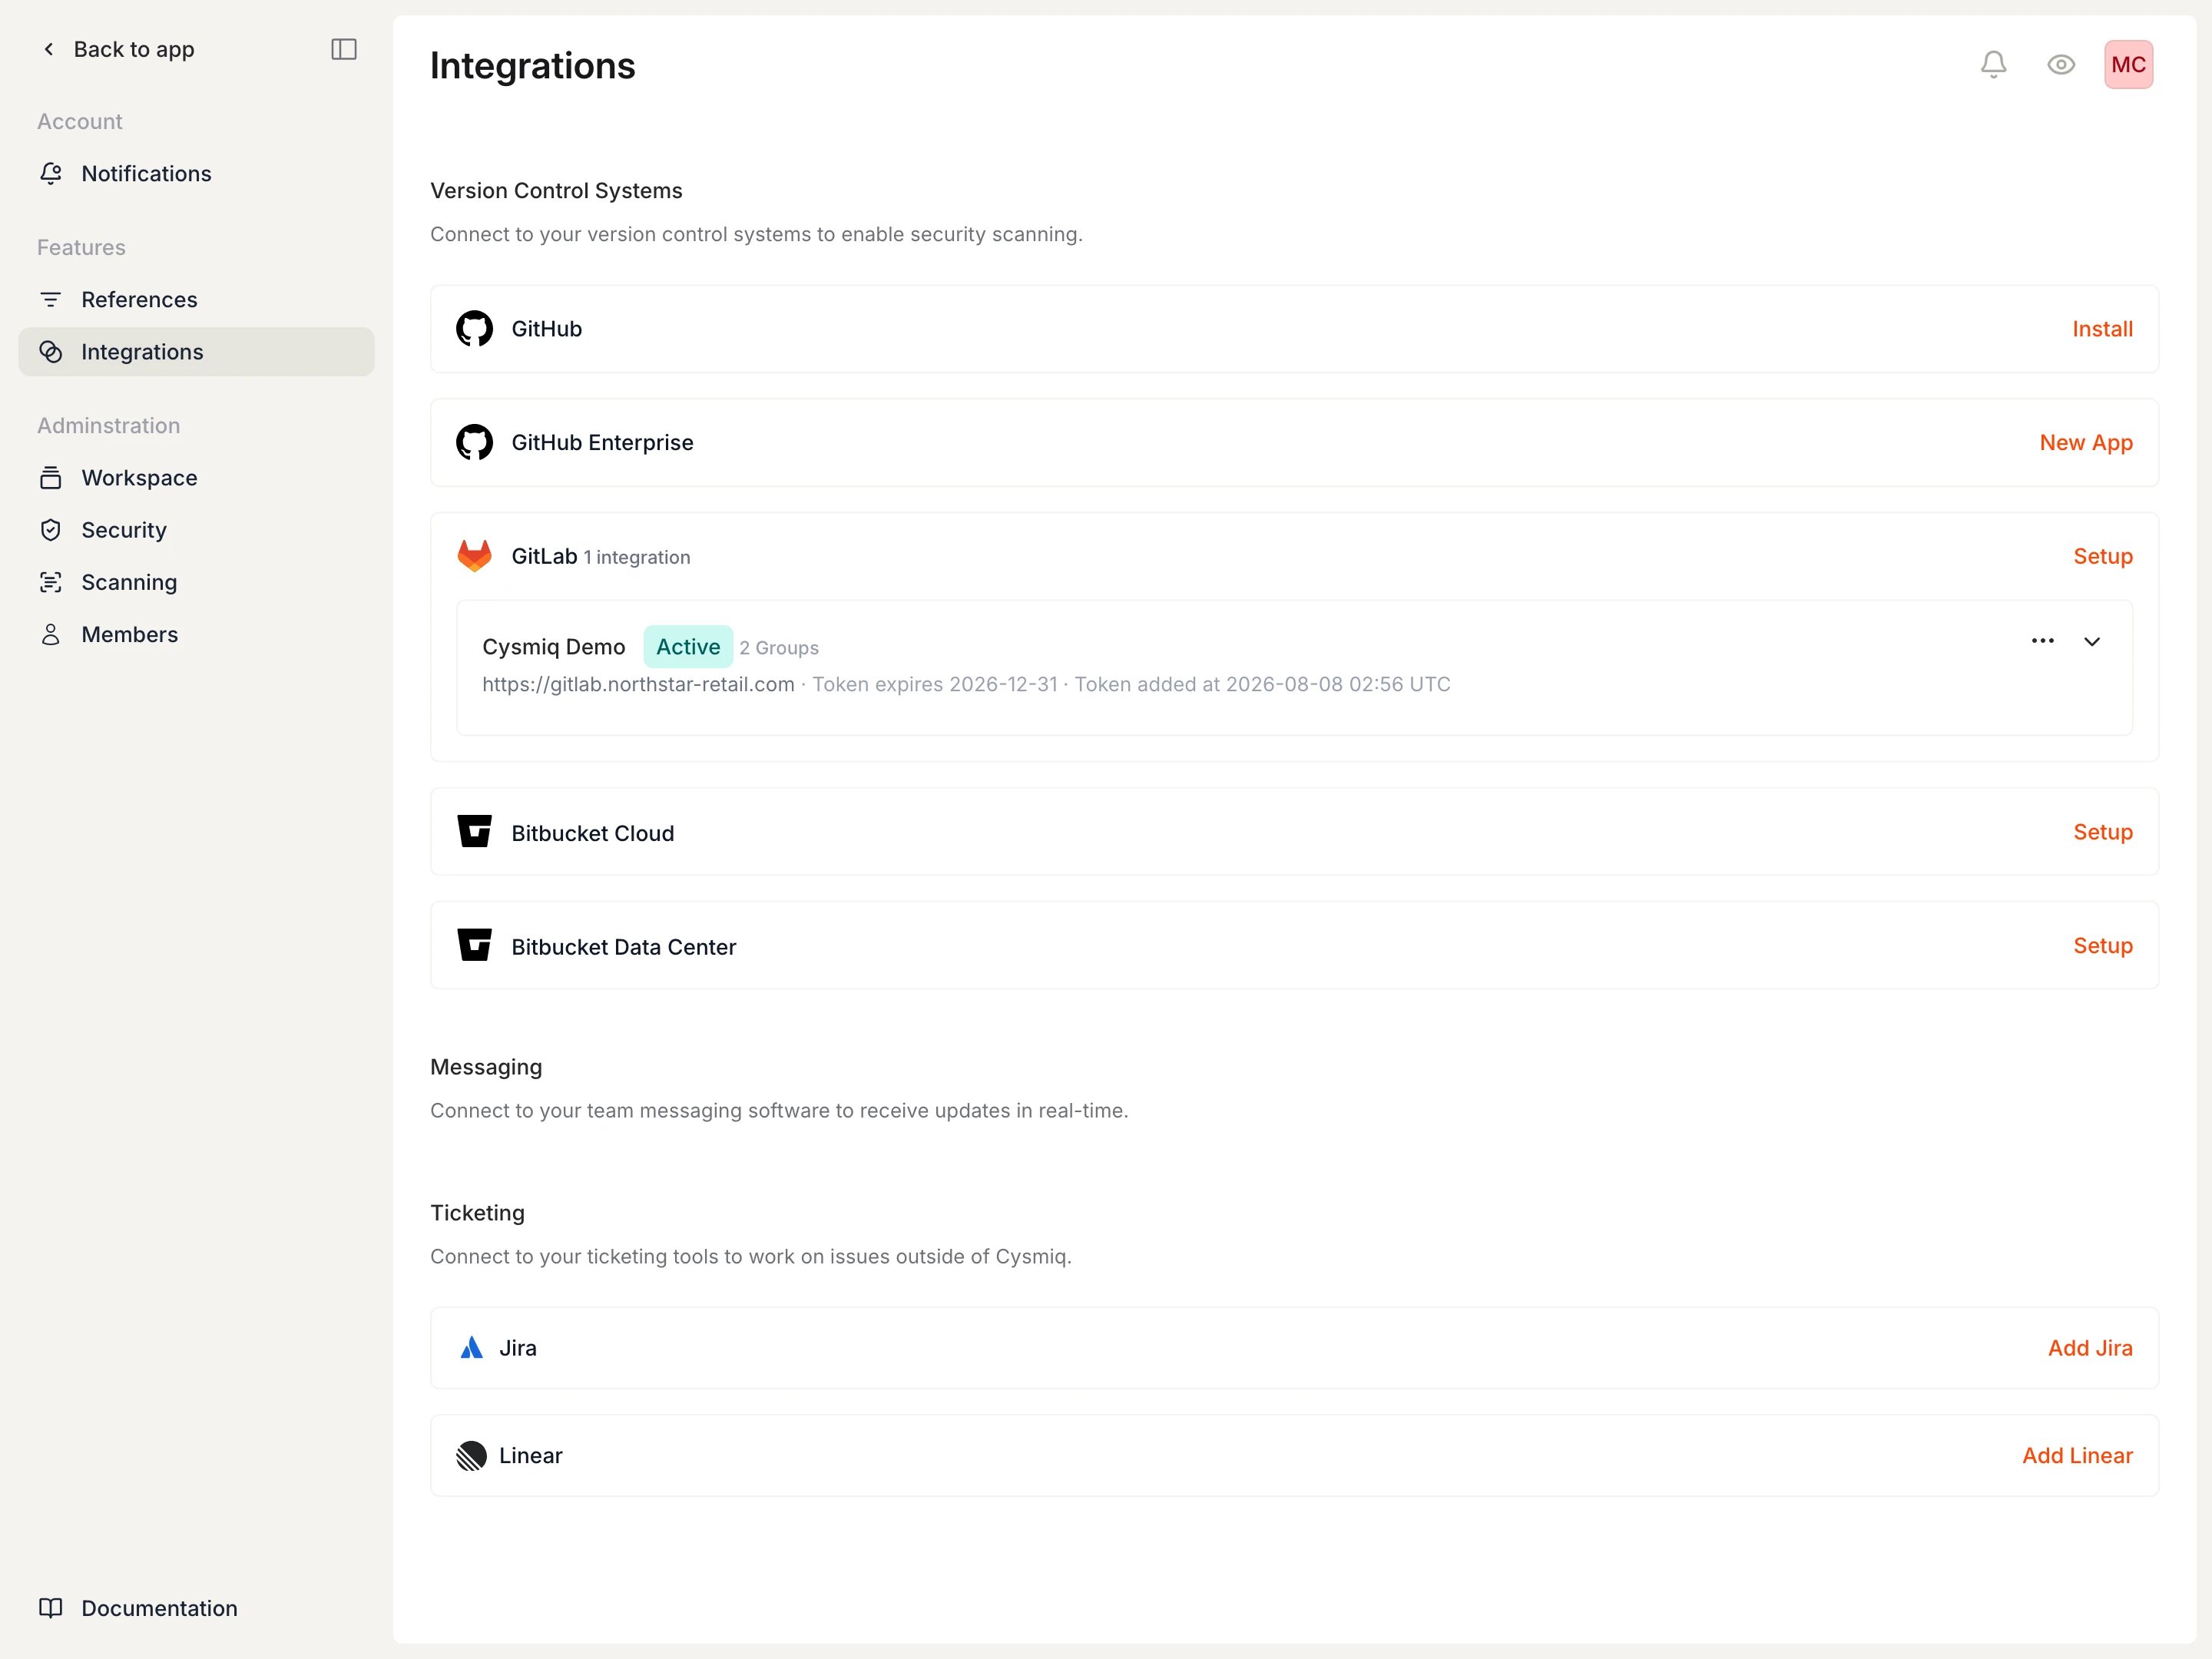
Create or open a workspace, then connect the VCS that contains the repository you want to scan.Follow Quickstart if you still need an account or workspace. See Connect a VCS for provider-specific permissions and connection steps.
A GitLab connection ready to discover and scan repositories.
2
Wait for the first scan to finish
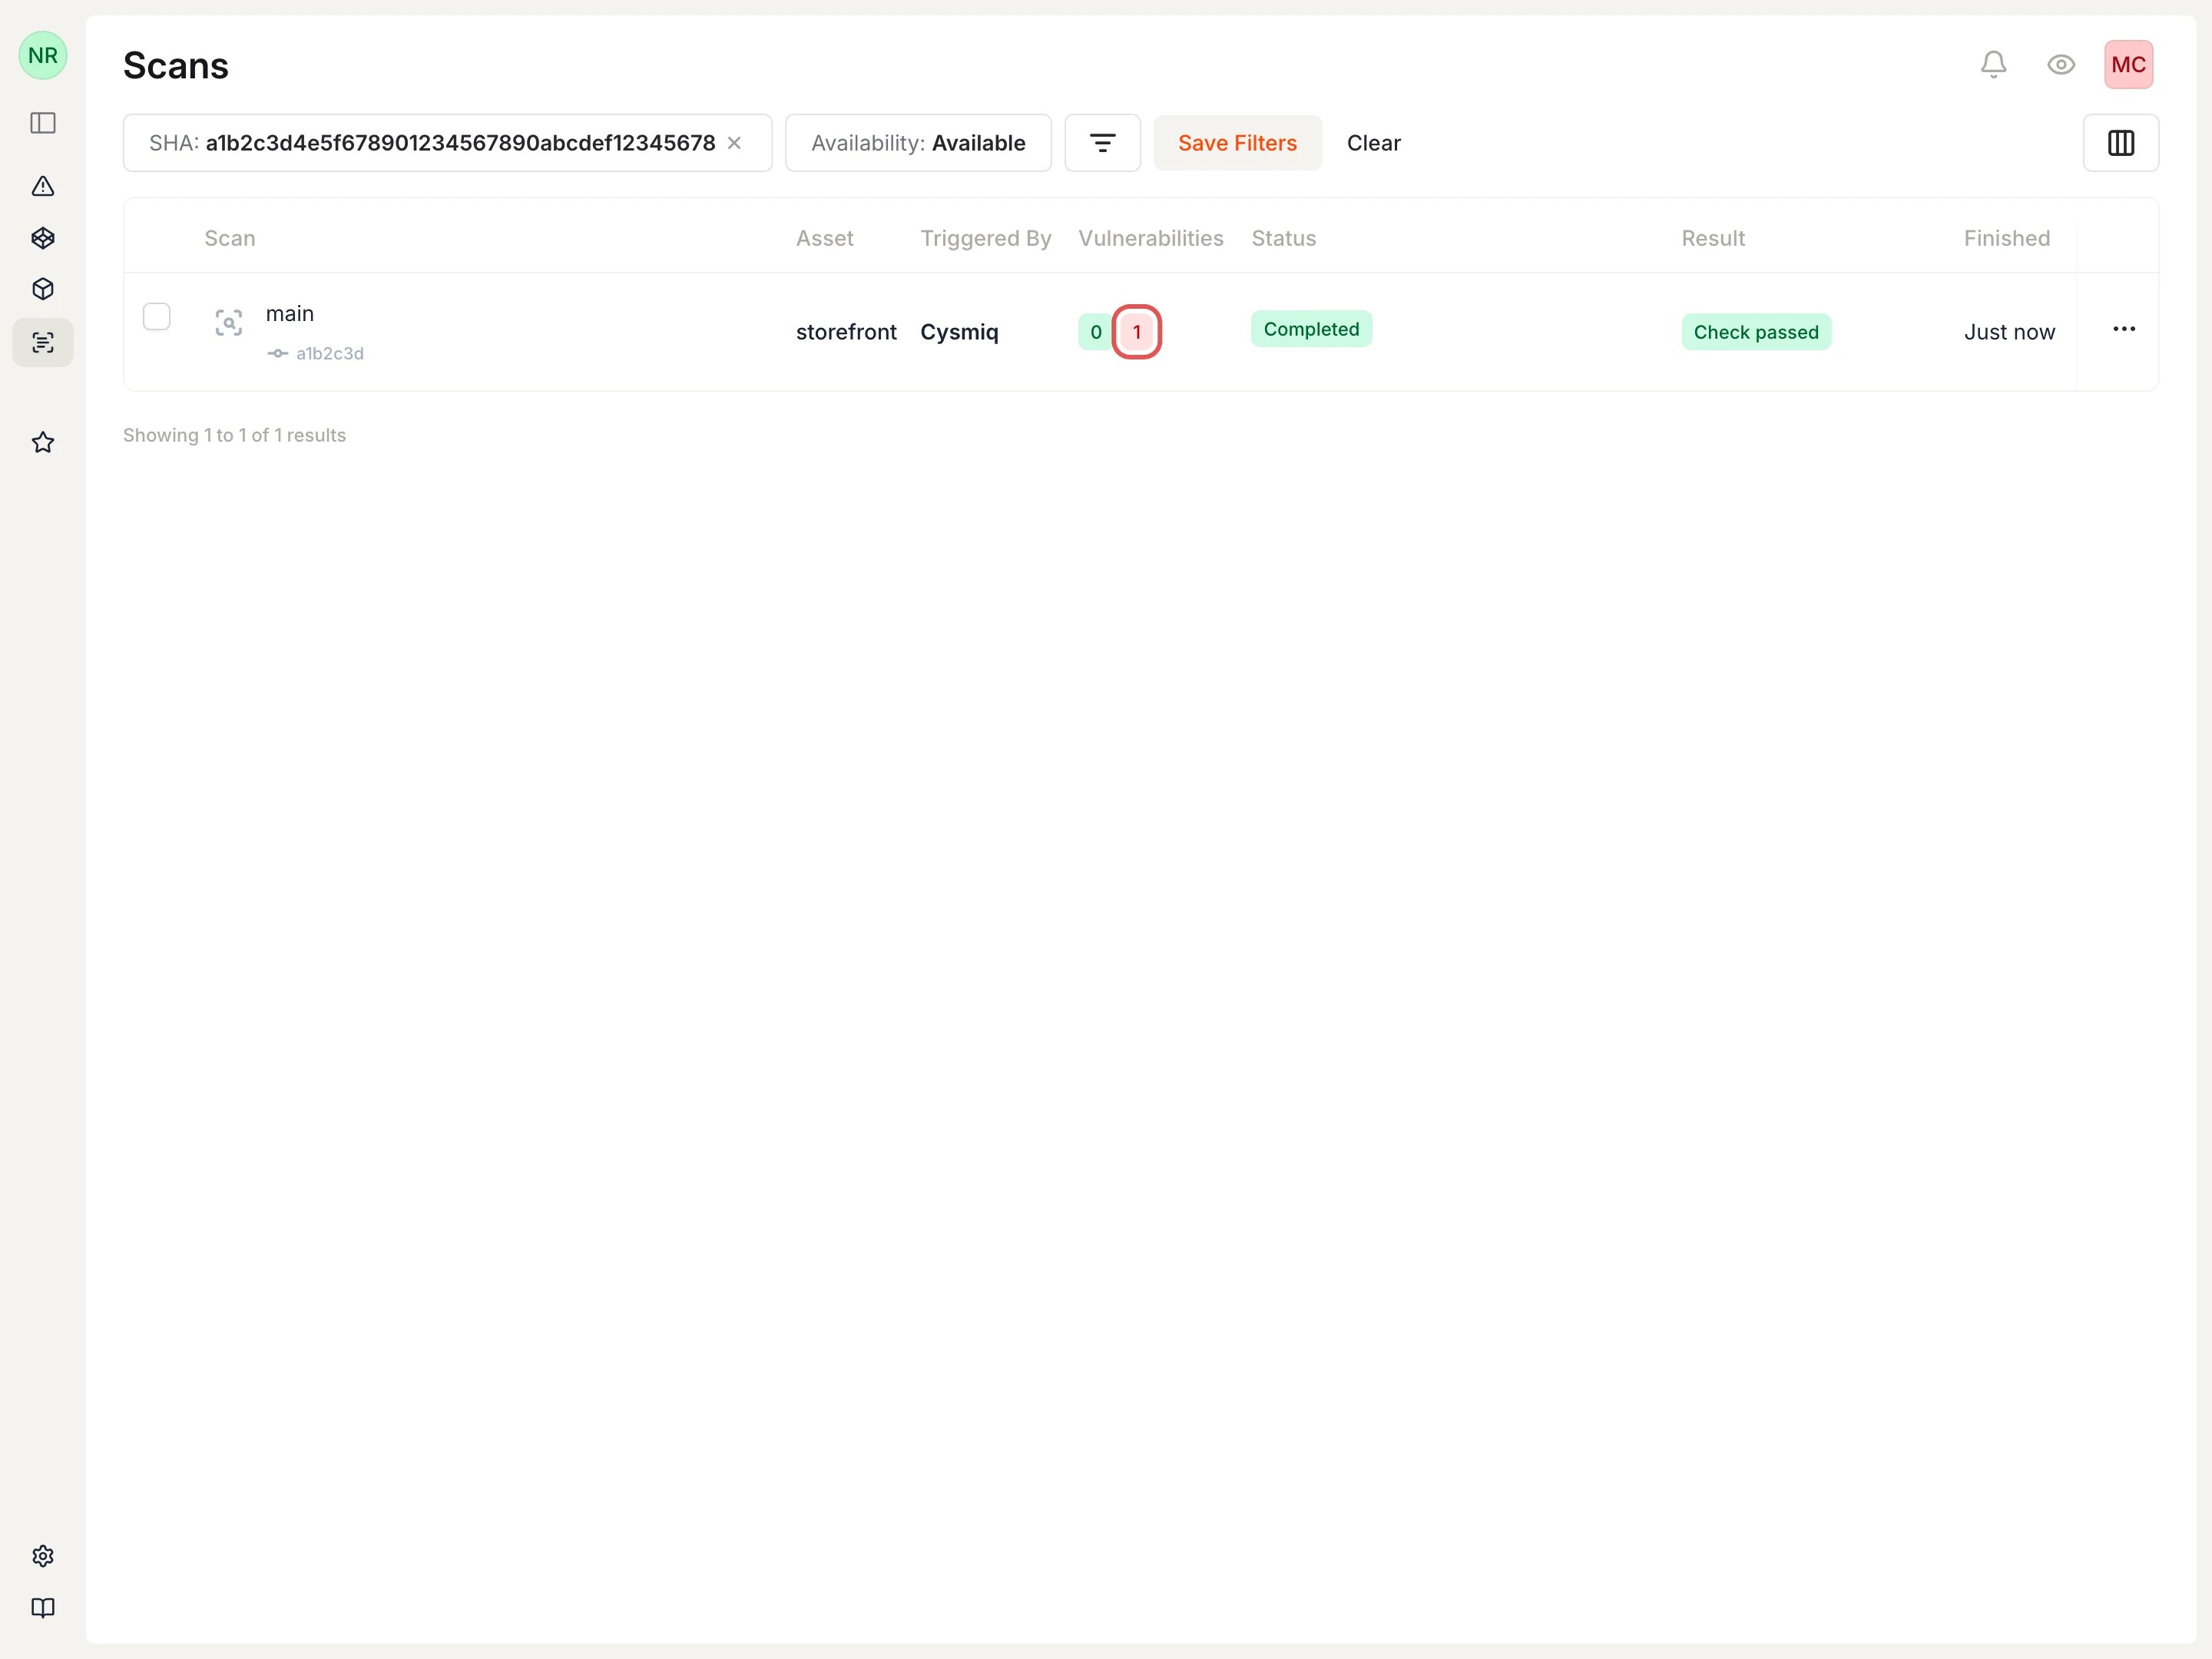
Cysmiq discovers repositories and queues scans after the connection is active. Open Scans and wait for the repository scan to reach Completed.
A completed scan for the connected repository.
The highlighted red count shows the actionable vulnerabilities first seen in this scan. Select it to open the findings.A completed scan can contain findings even when the provider check or pull request result passes. See Scan status and result for the distinction.
3
Open an actionable finding
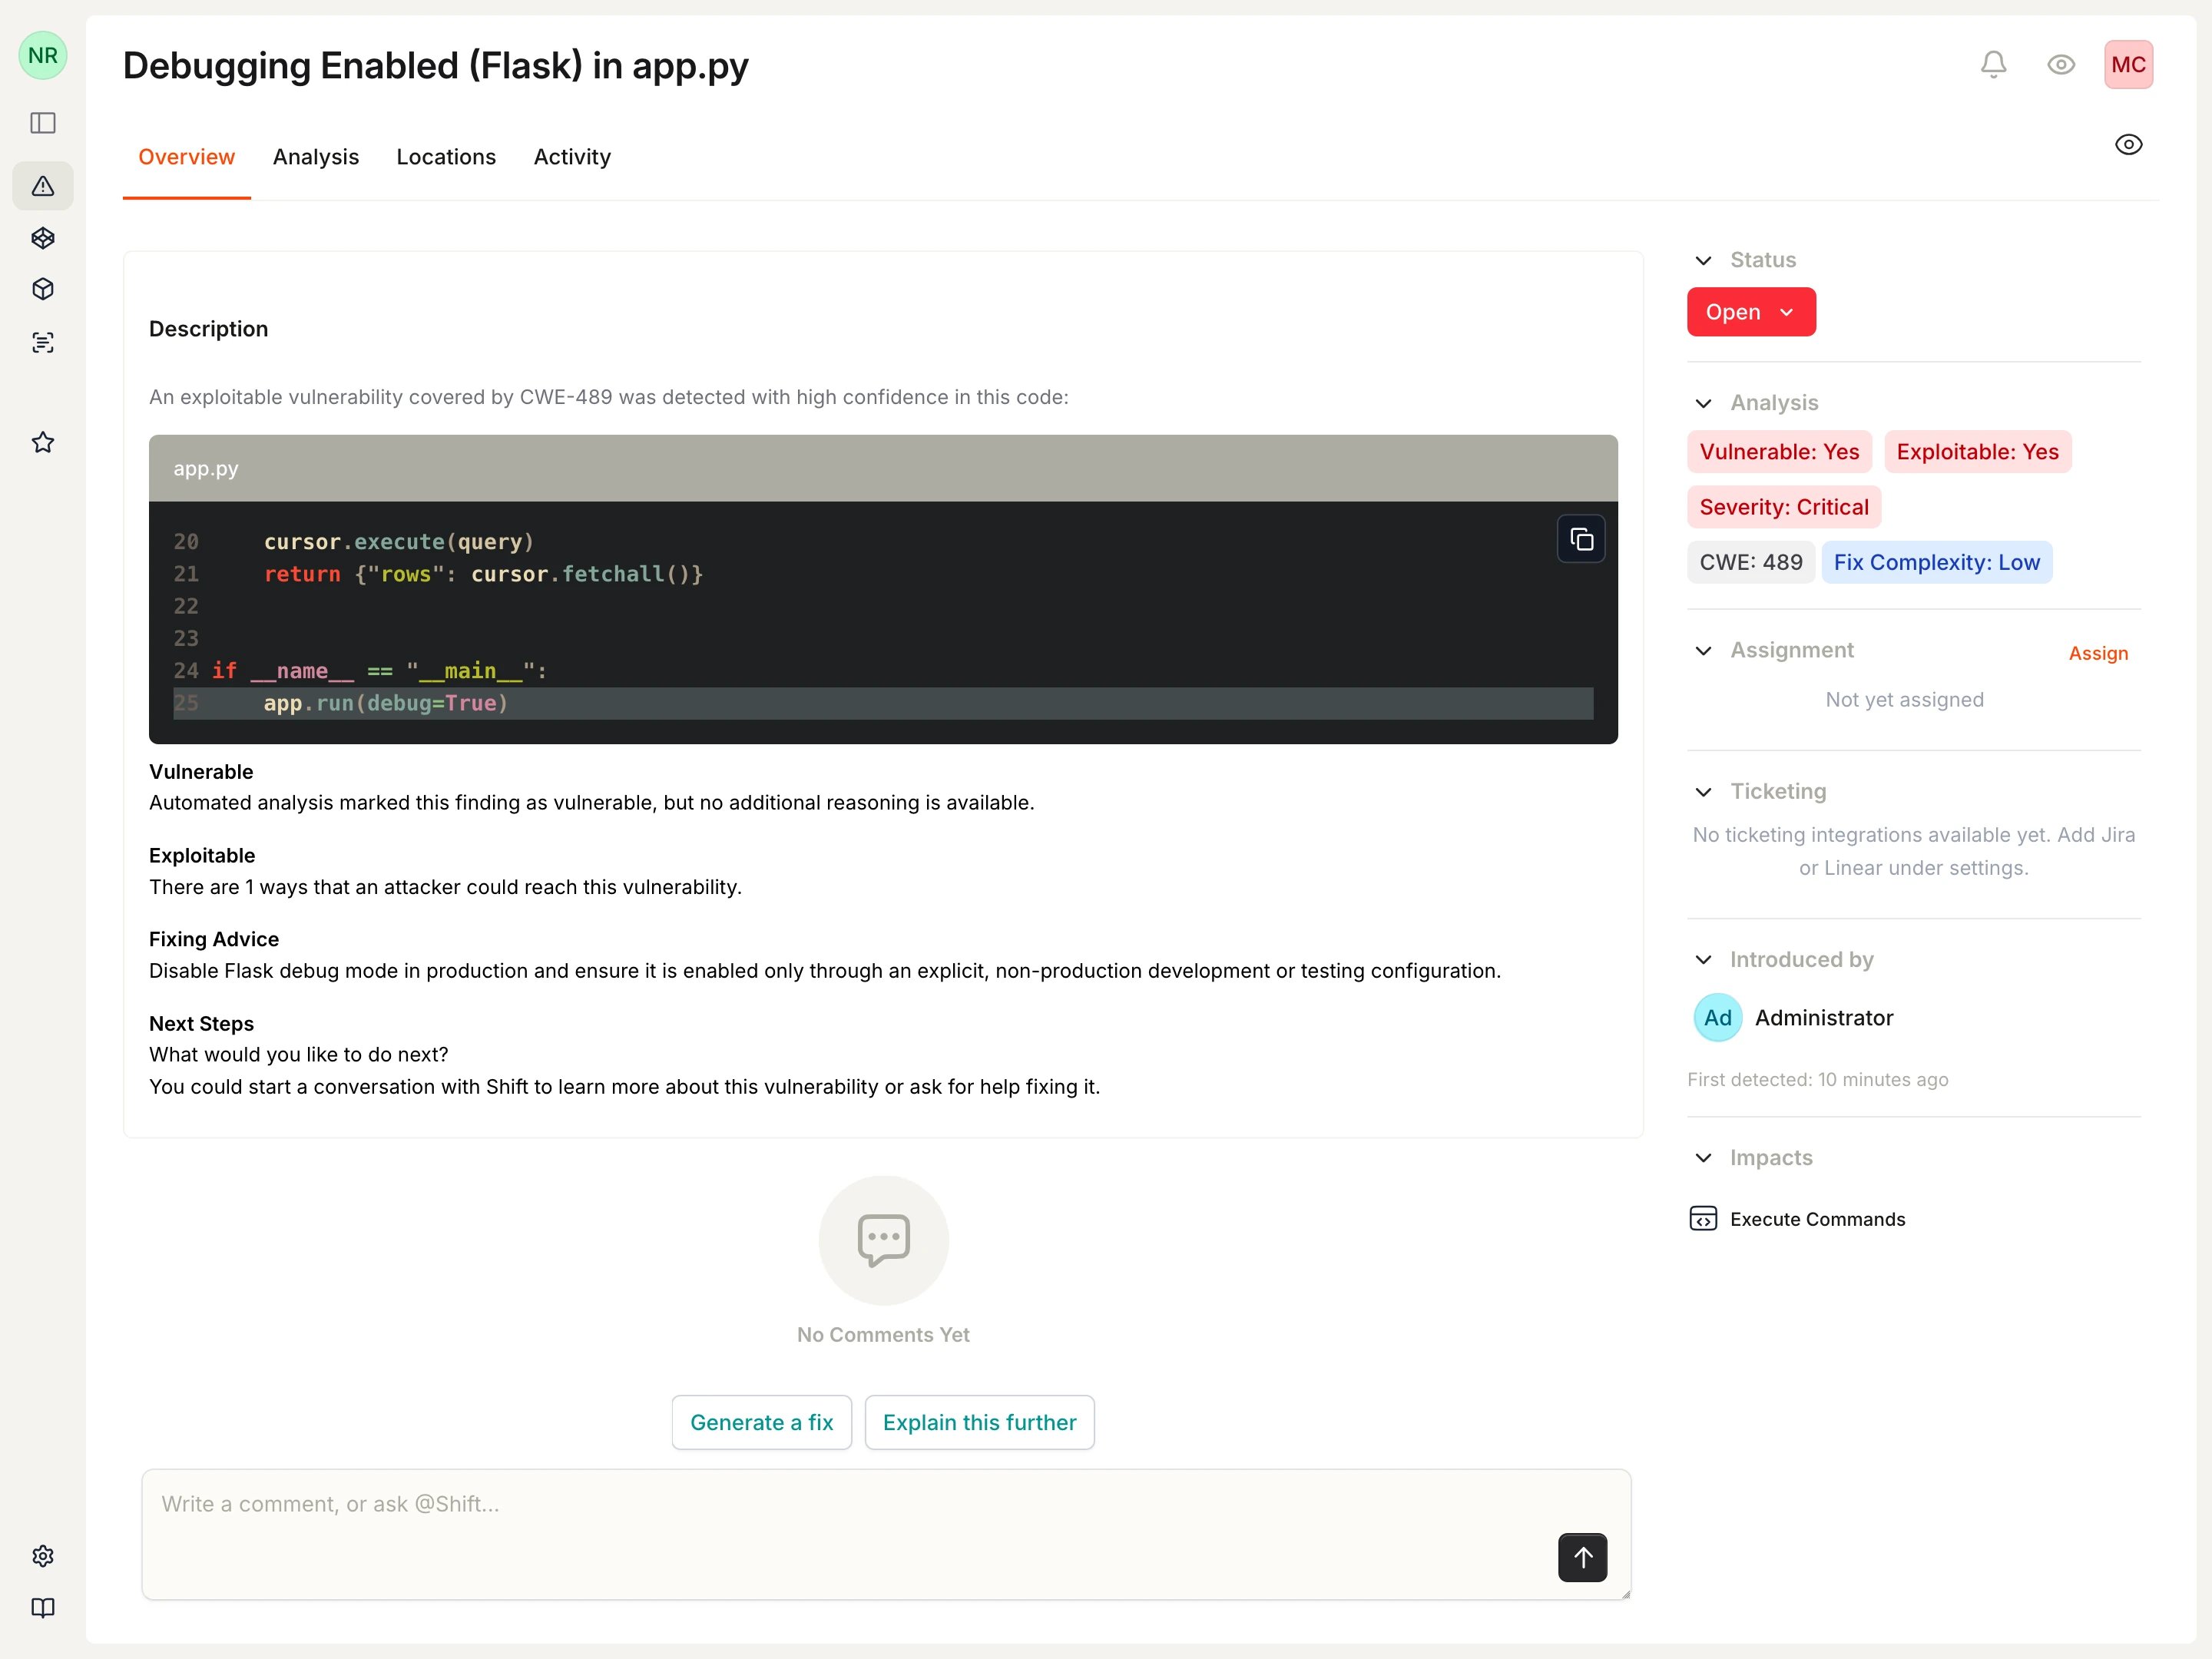
Select the vulnerability count from the scan, or open Vulnerabilities and select the finding. Start with an actionable item whose evidence and fixing advice you can review with the repository owner.
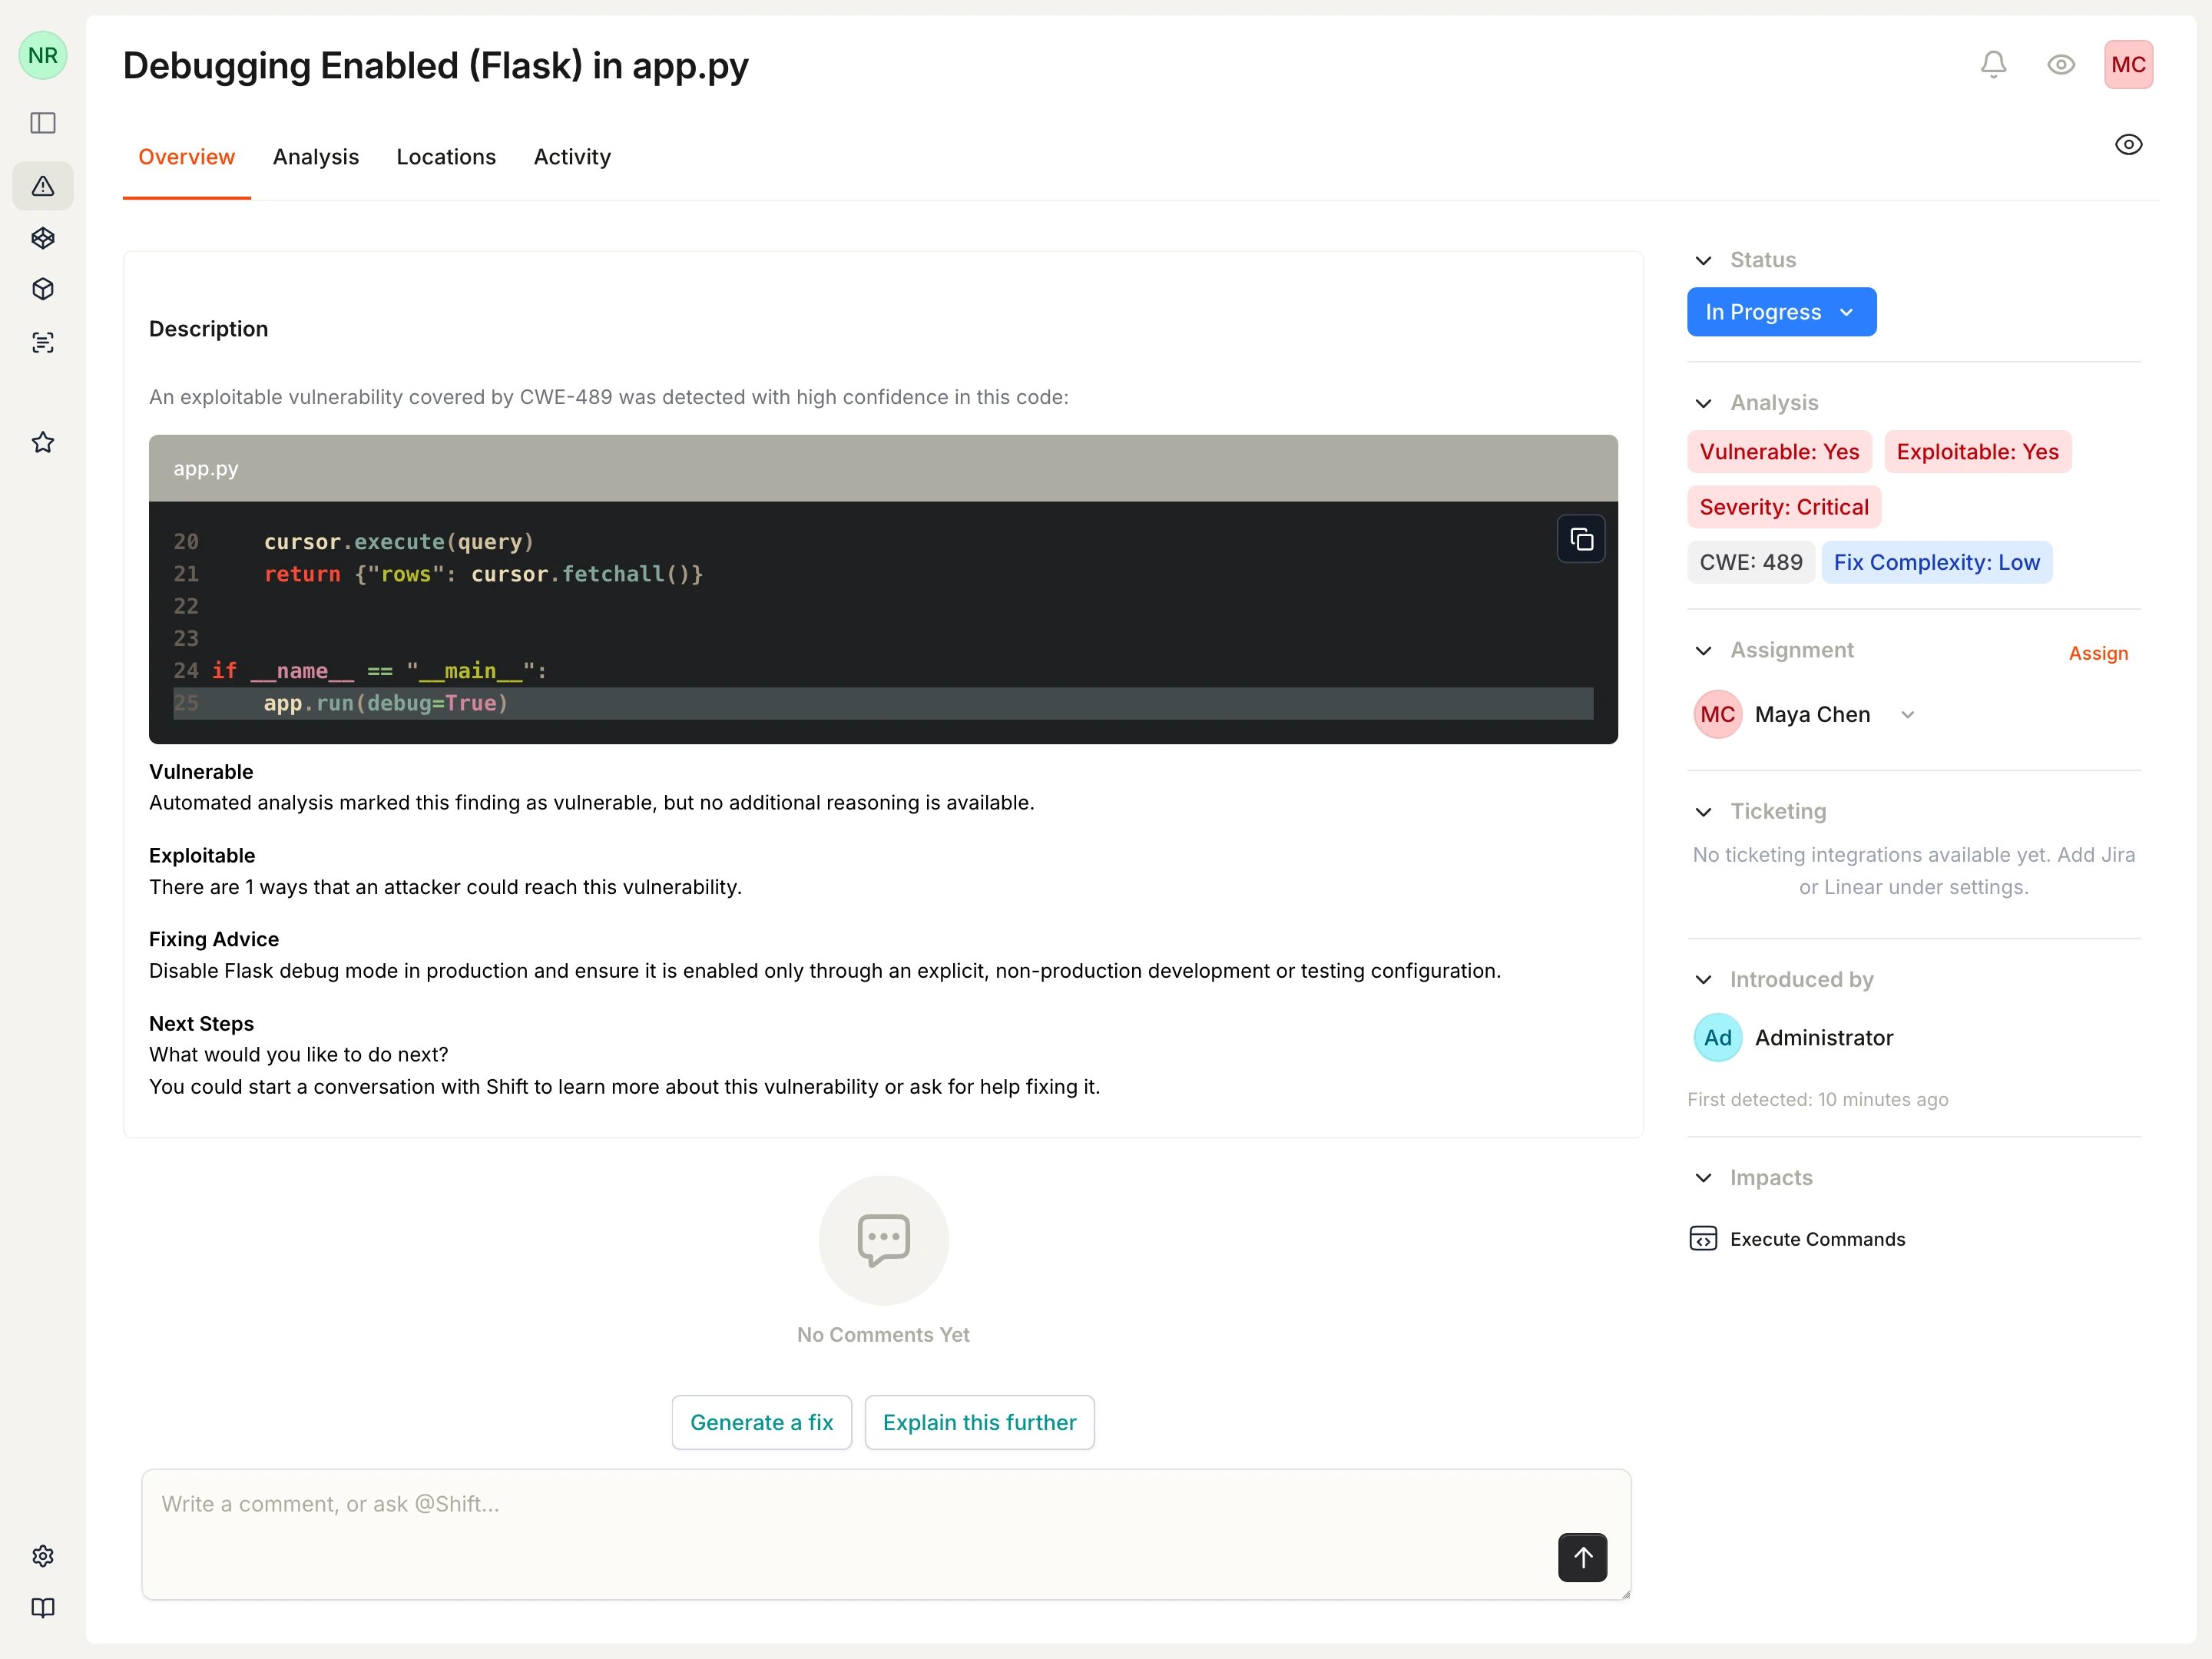
A Flask debug finding with source evidence and workflow controls.
4
Understand the analysis
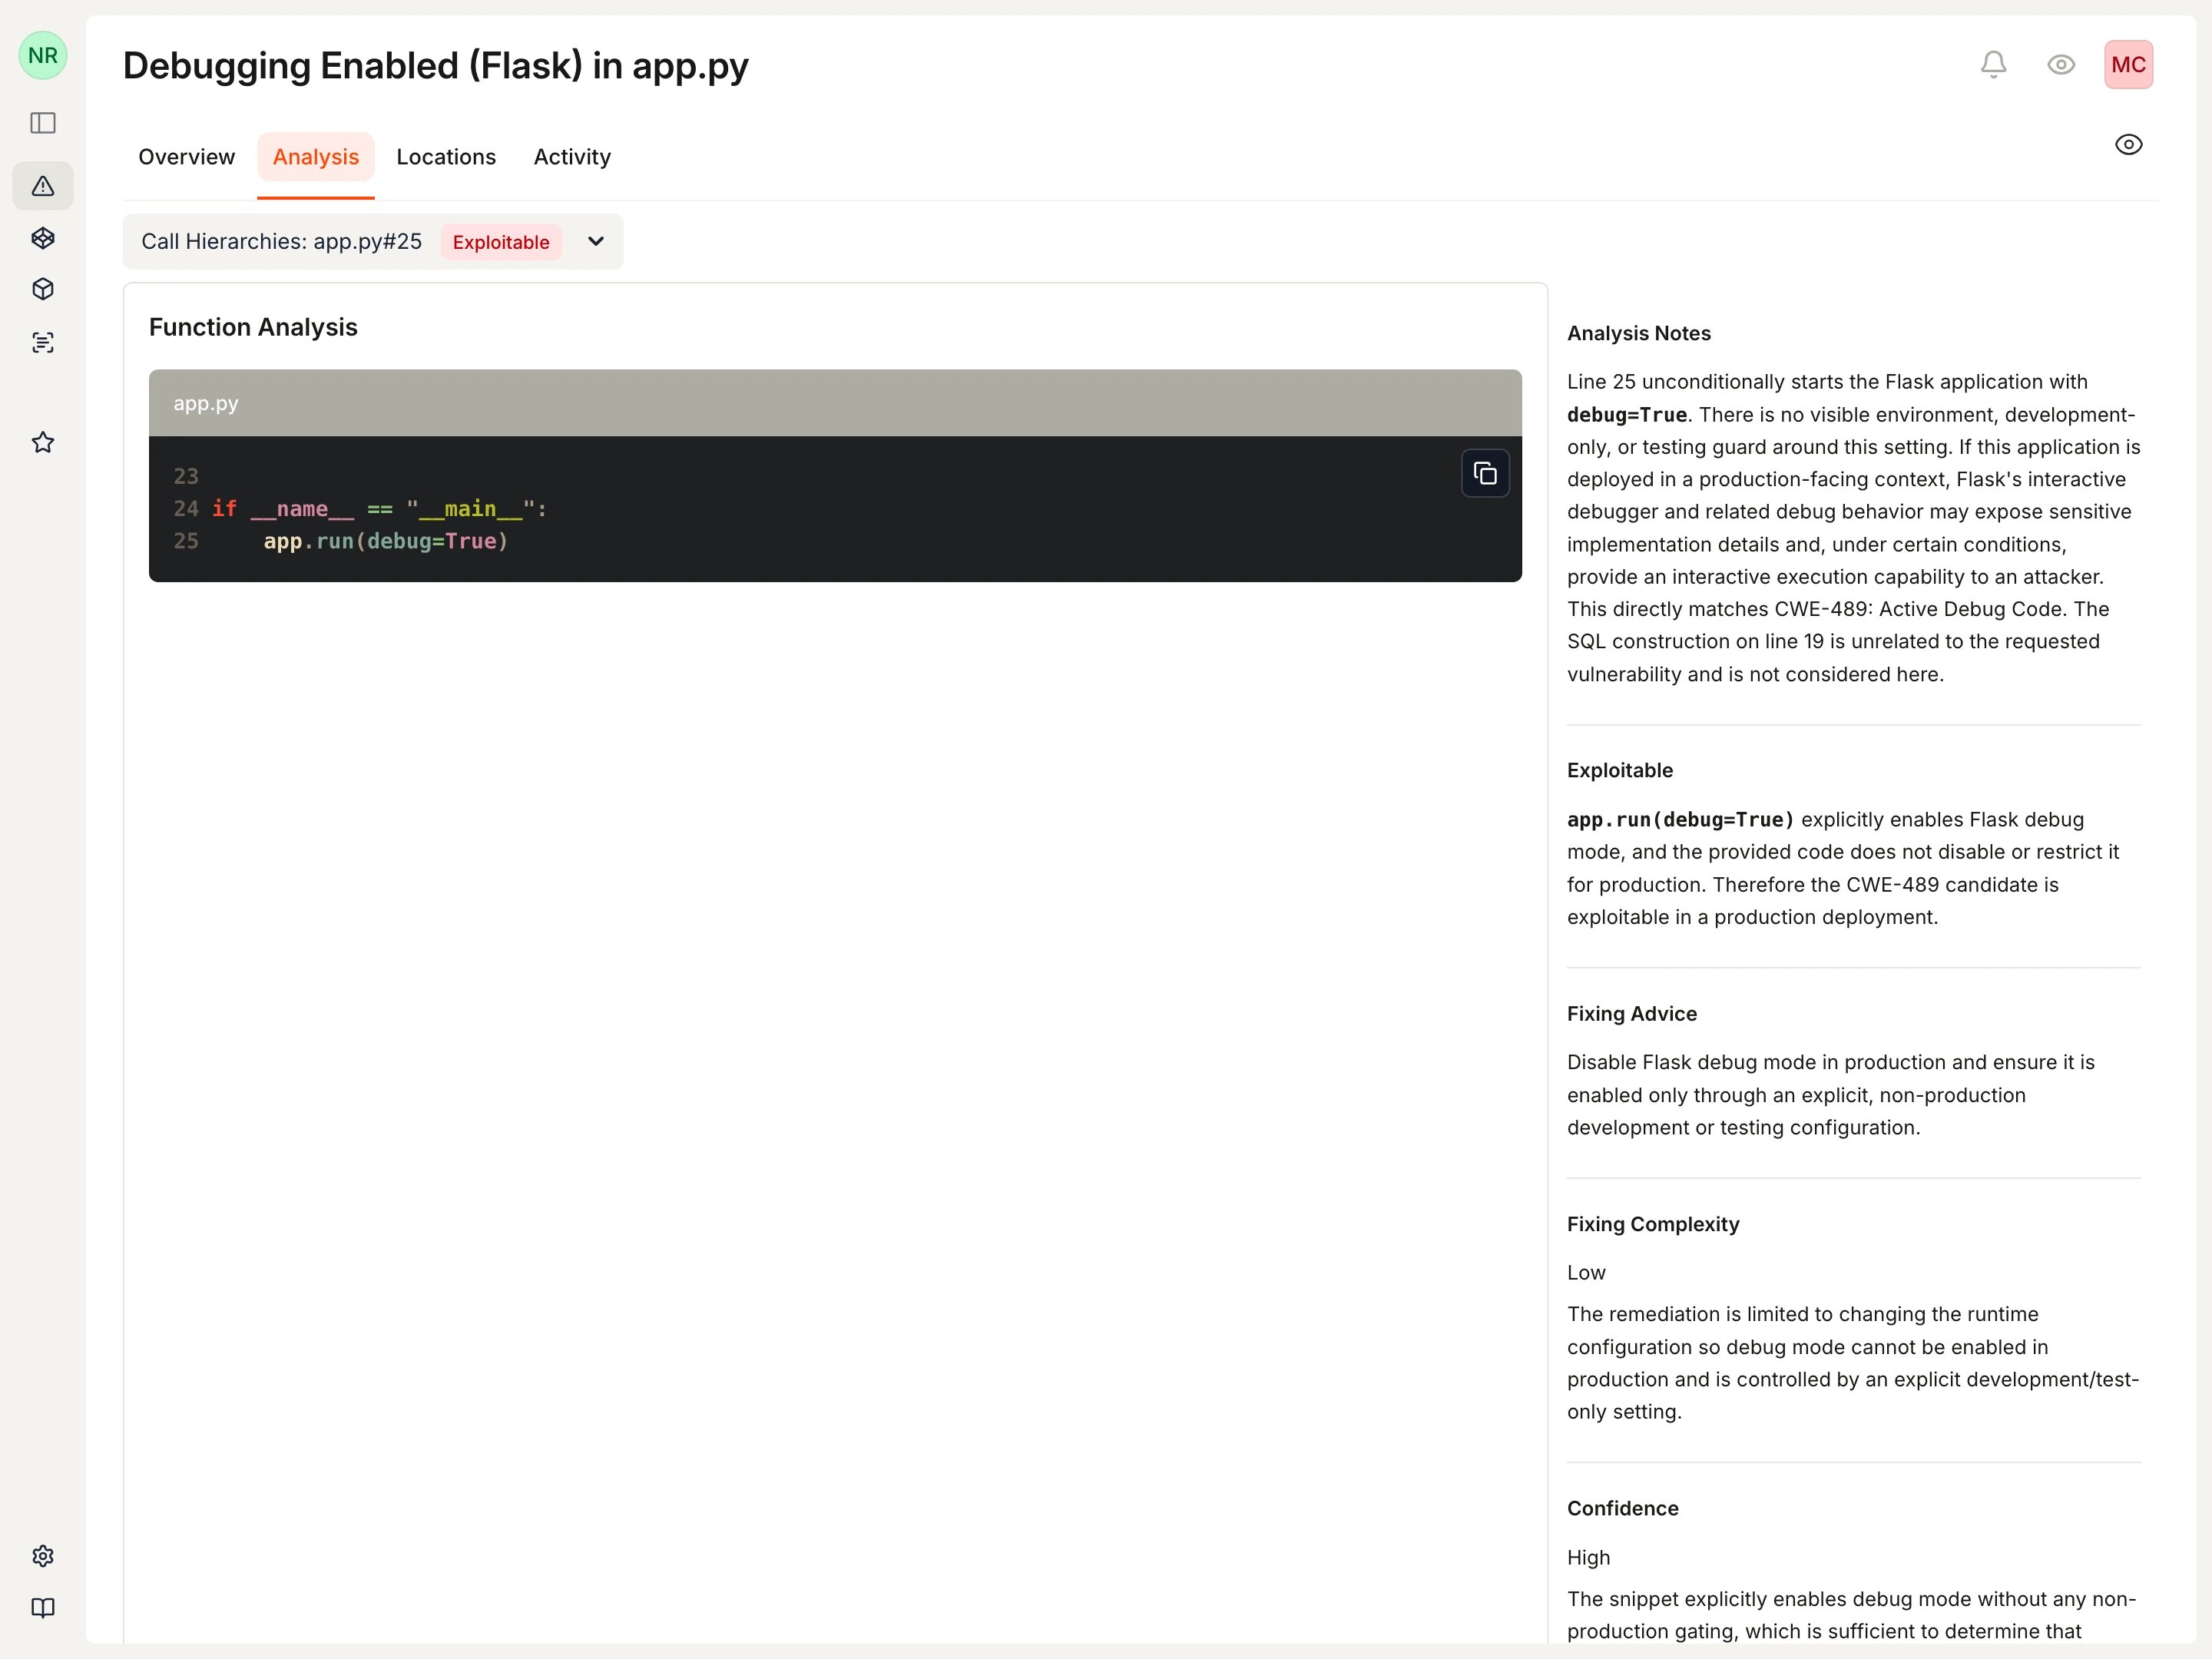
Review the Overview first, then open Analysis when it is available. Use the call hierarchy, analysis notes, exploitability reasoning, fixing advice, complexity, and confidence to understand why the finding matters and what a suitable fix should accomplish.
Analysis explains why the Flask debug configuration is exploitable and how to address it.
Mention @Shift in the finding chat to ask questions about the evidence or remediation in any language. Explain this further and Generate a fix are prompt templates that add a context-specific request to the chat input. You can edit the prompt before sending it. See Ask Shift for the complete conversation and fix-review workflow.
5
Take ownership of the work
Assign the finding to the person responsible for remediation and move it to In Progress. Add a short comment that records the intended next step.
Update the code or configuration according to the fixing advice, review the change, and push it to the monitored branch. Cysmiq queues a follow-up scan for the new revision.
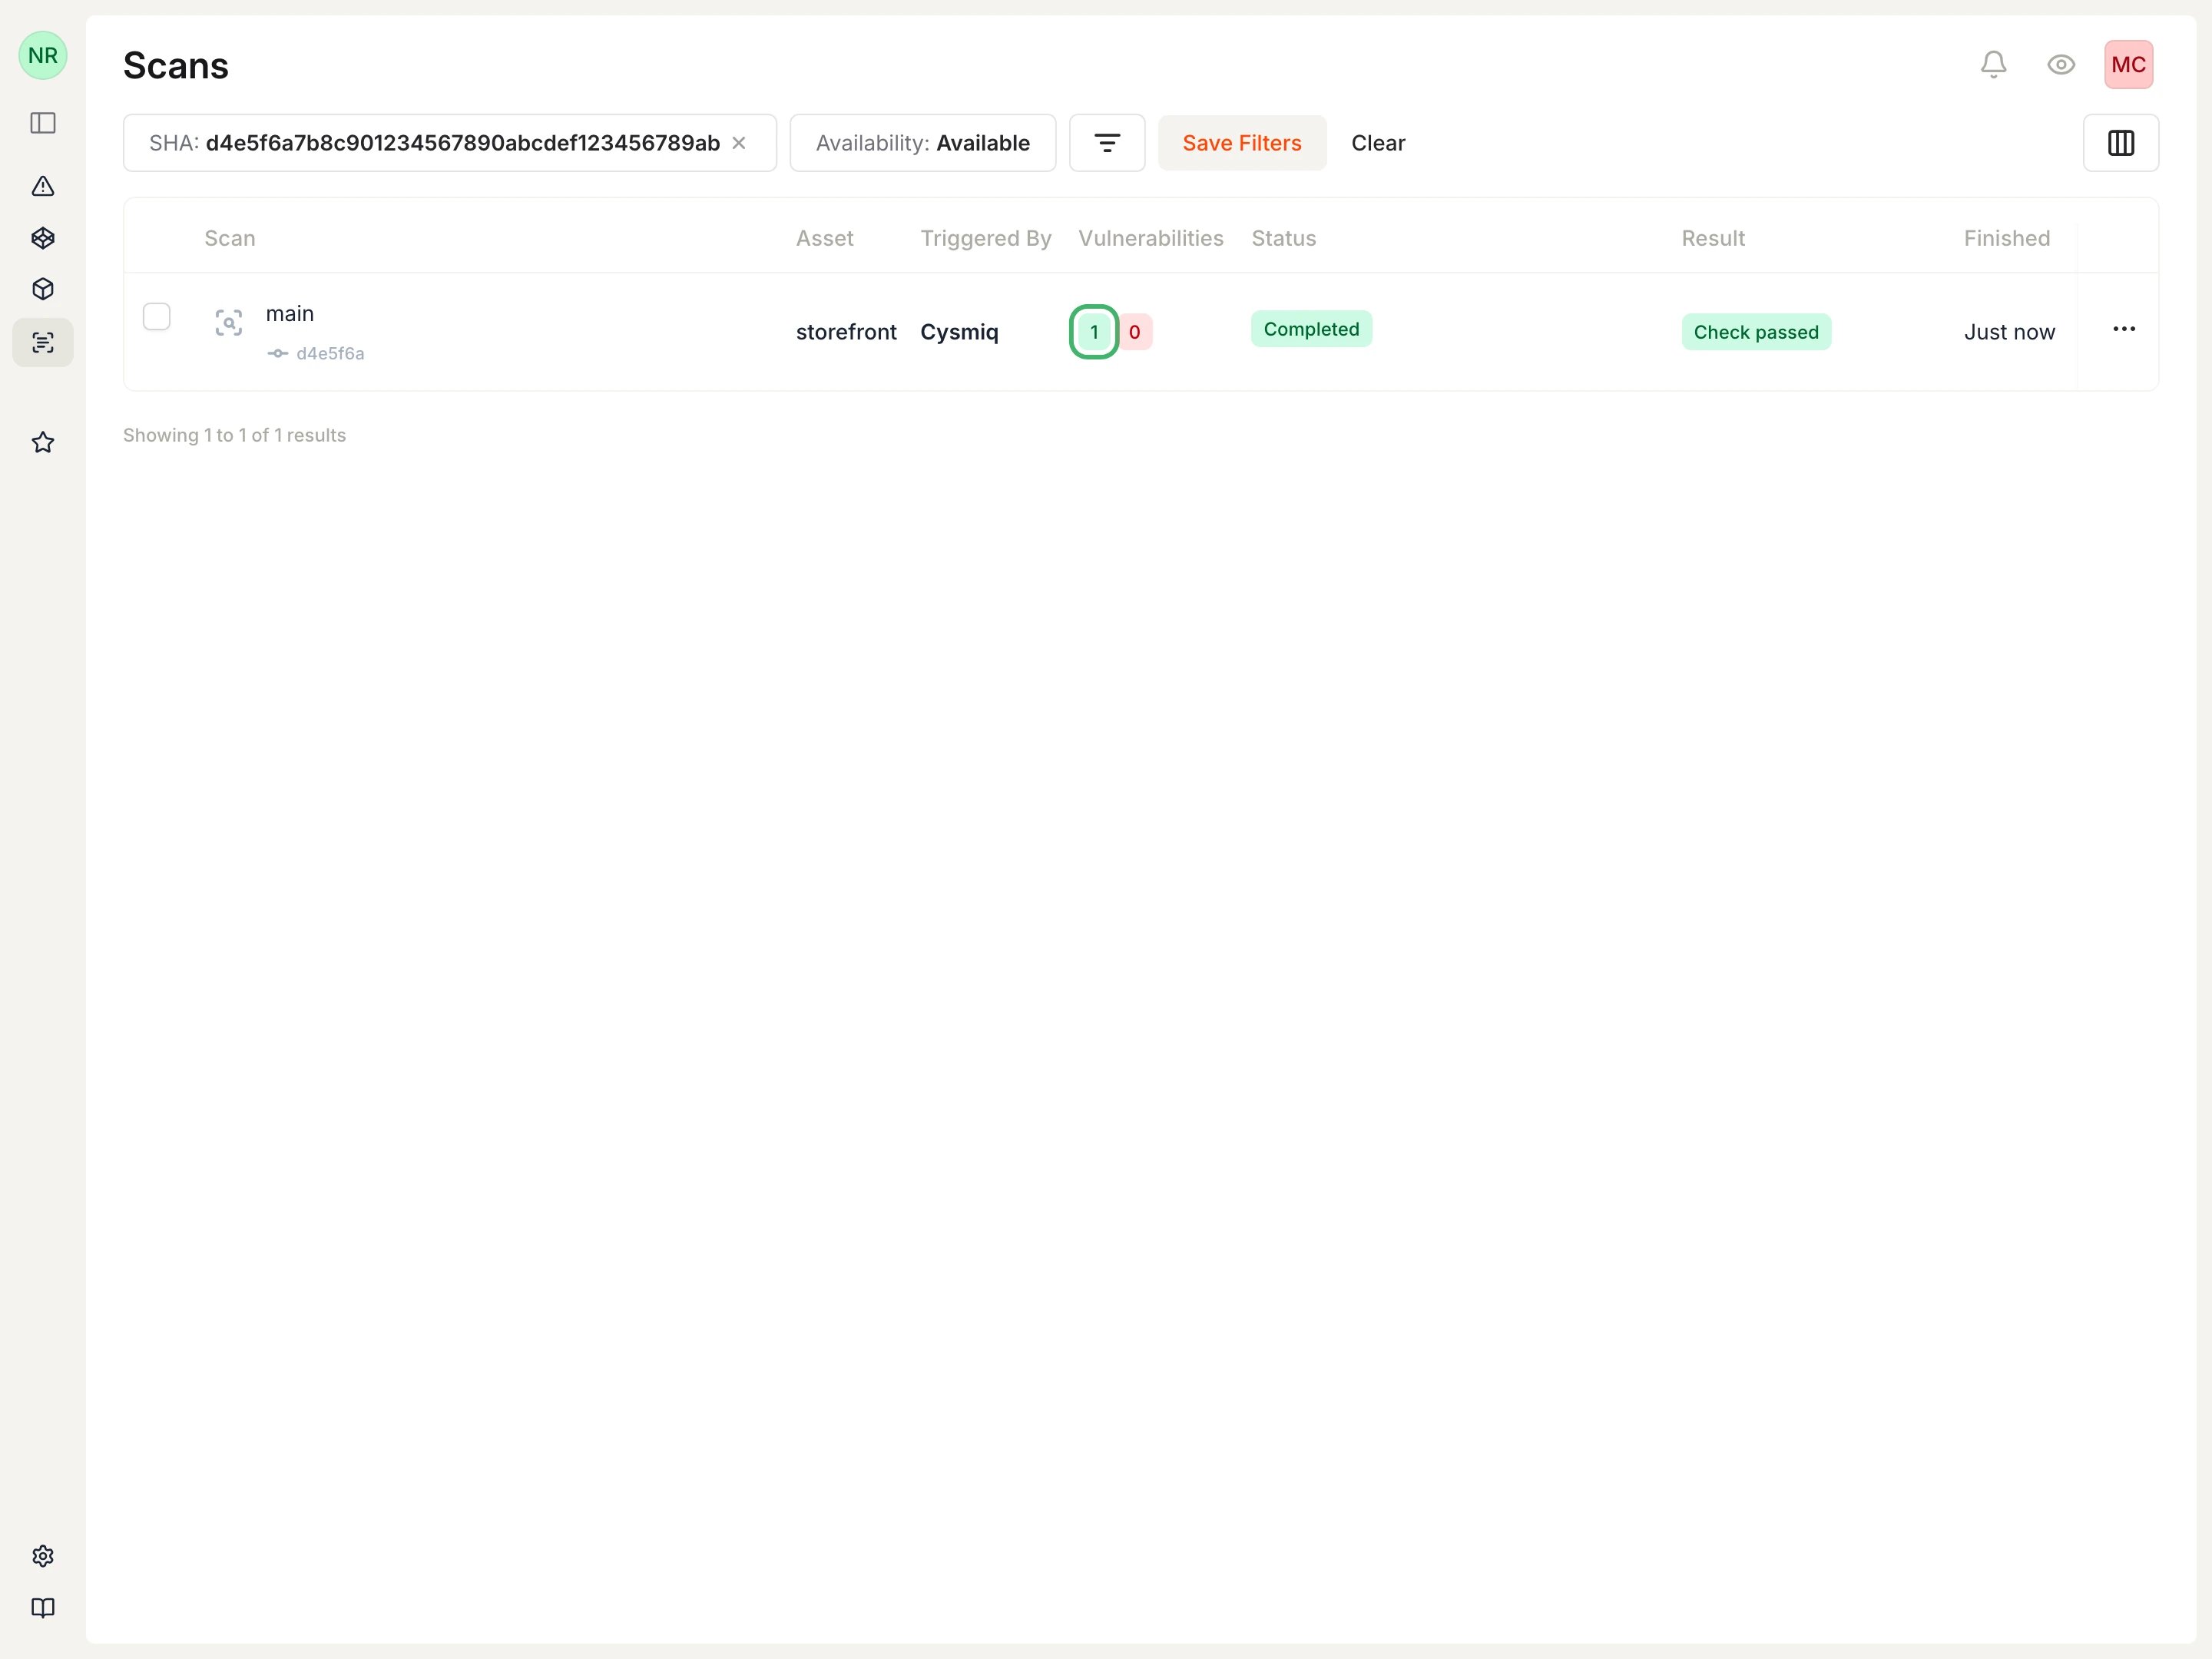
The follow-up scan completes after the fix is pushed.
The highlighted green count shows the vulnerability fixed by this scan.
7
Verify the remediation
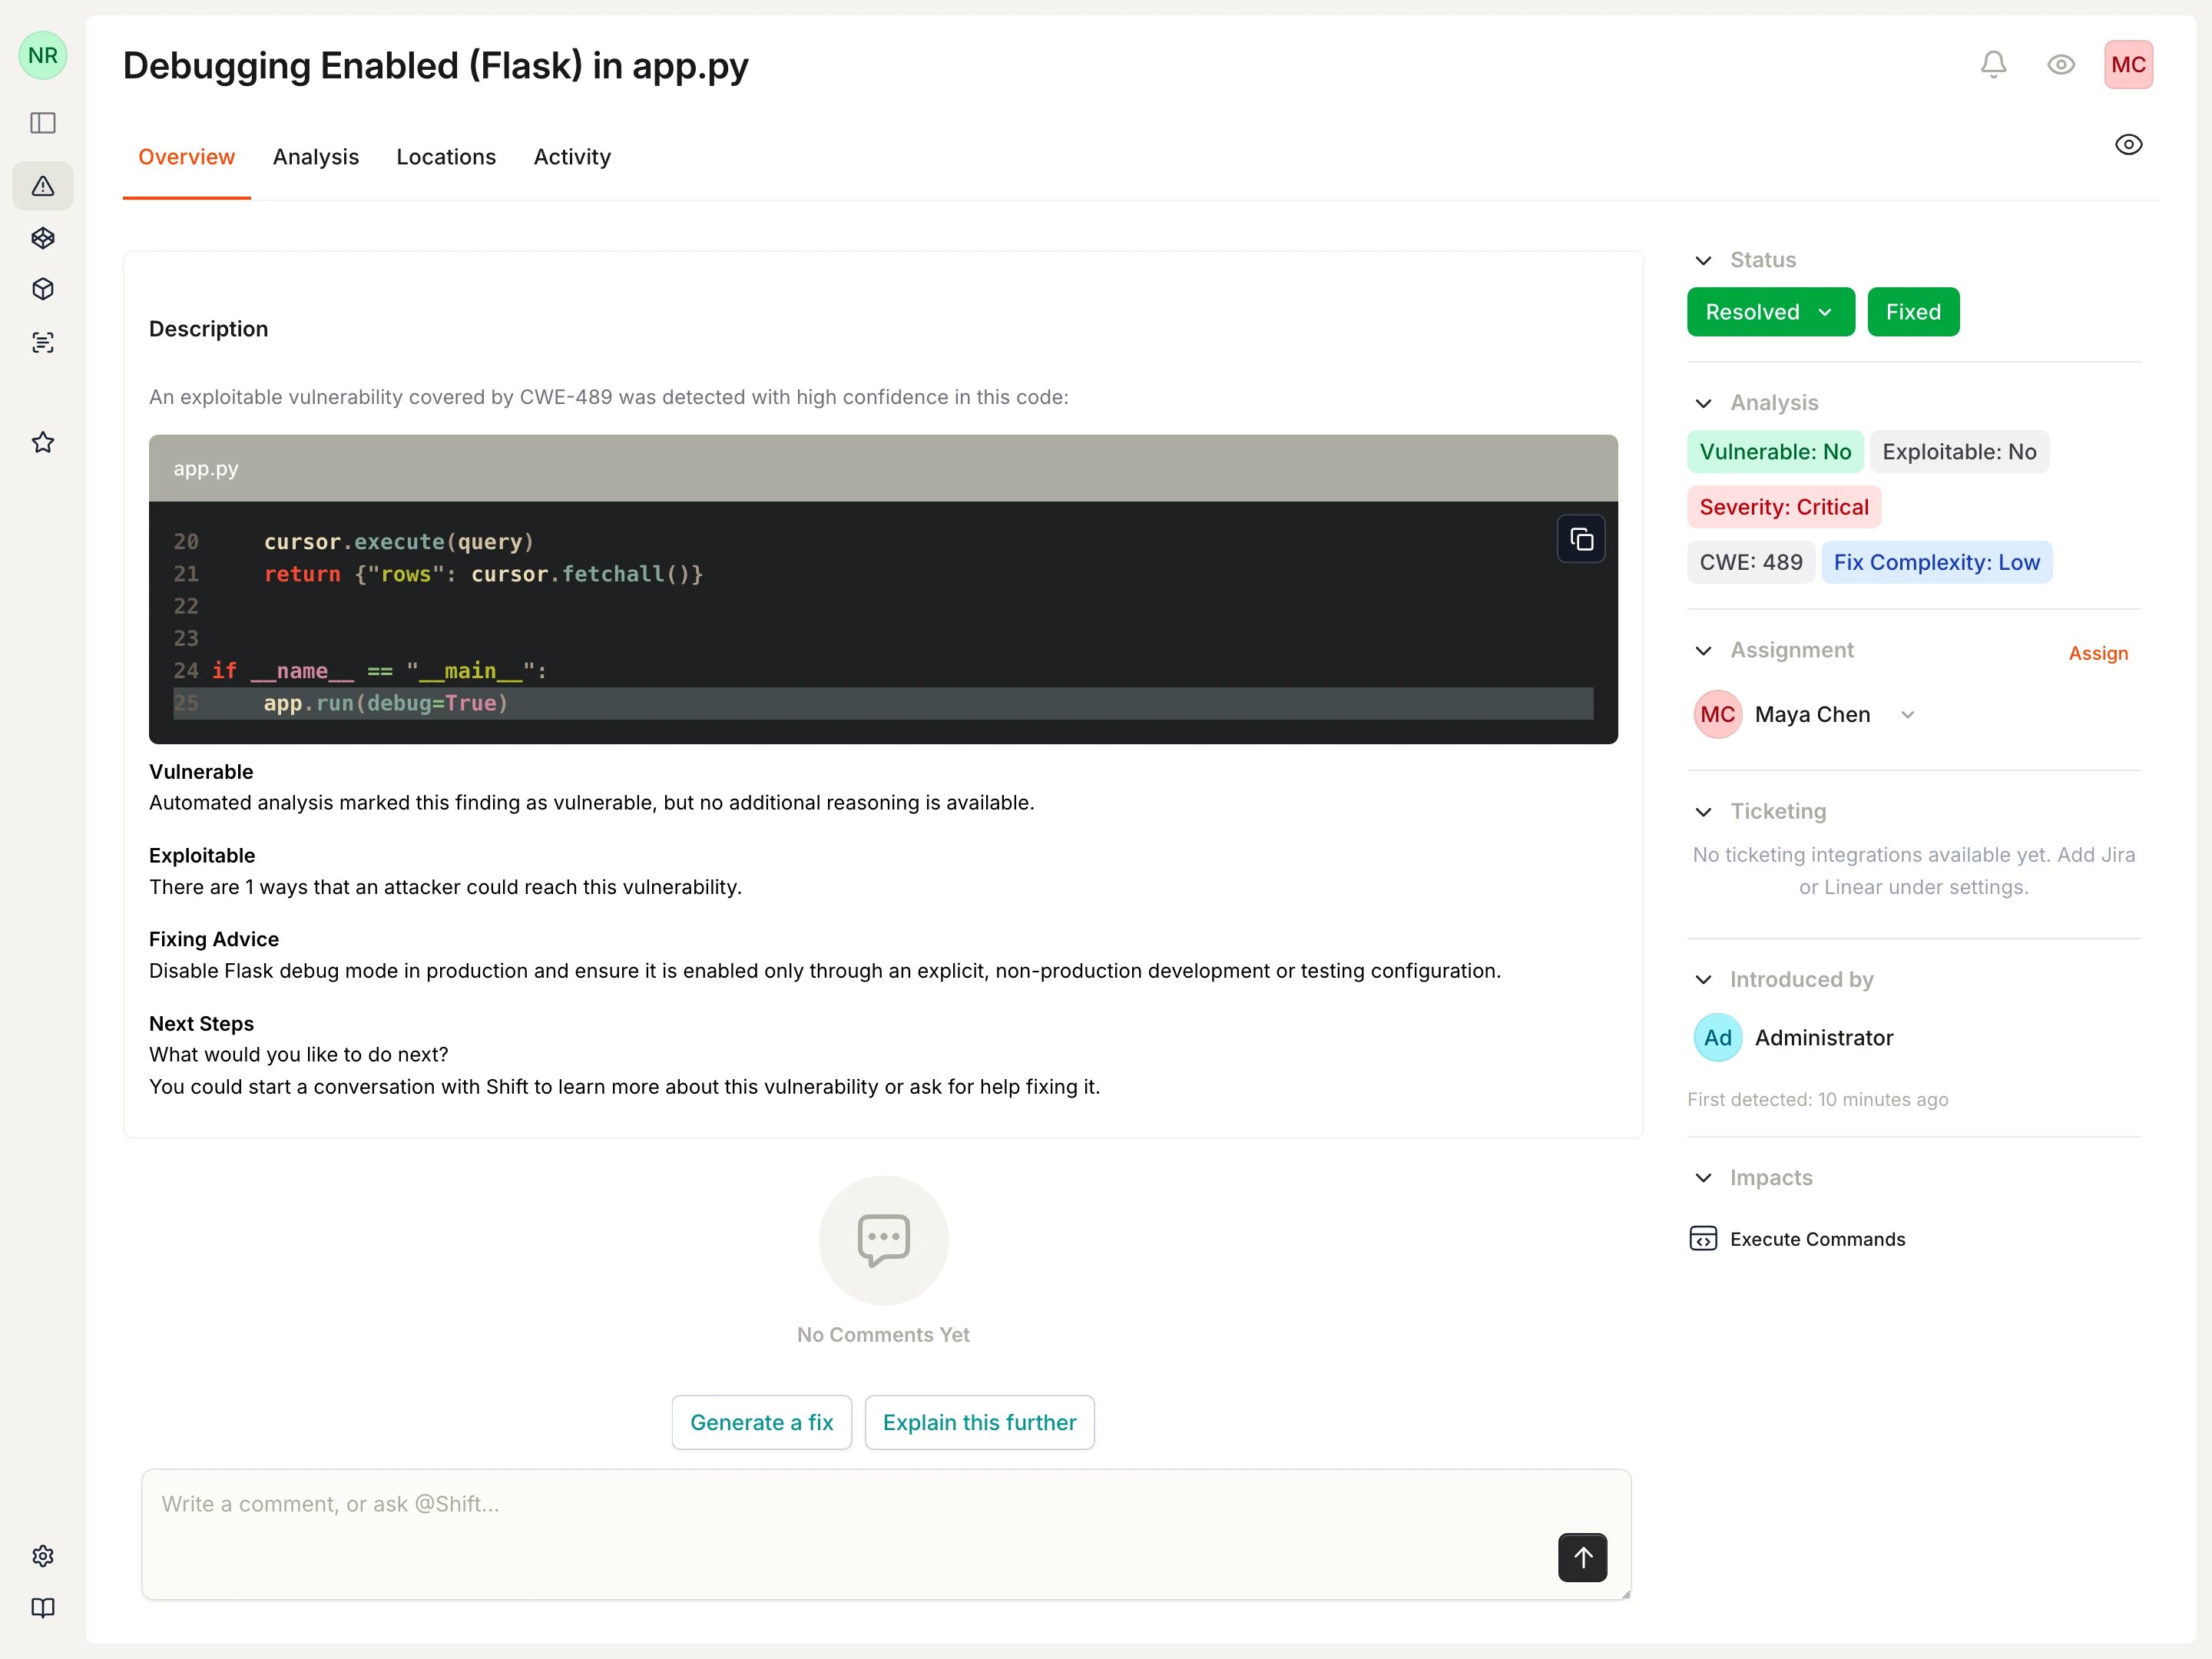
Return to the finding and confirm that Cysmiq marked it Resolved with the Fixed resolution. Review Activity when you need the recorded assignment, status, and scan-driven resolution history.
The follow-up scan marks the finding as resolved and fixed.
8
Invite a teammate
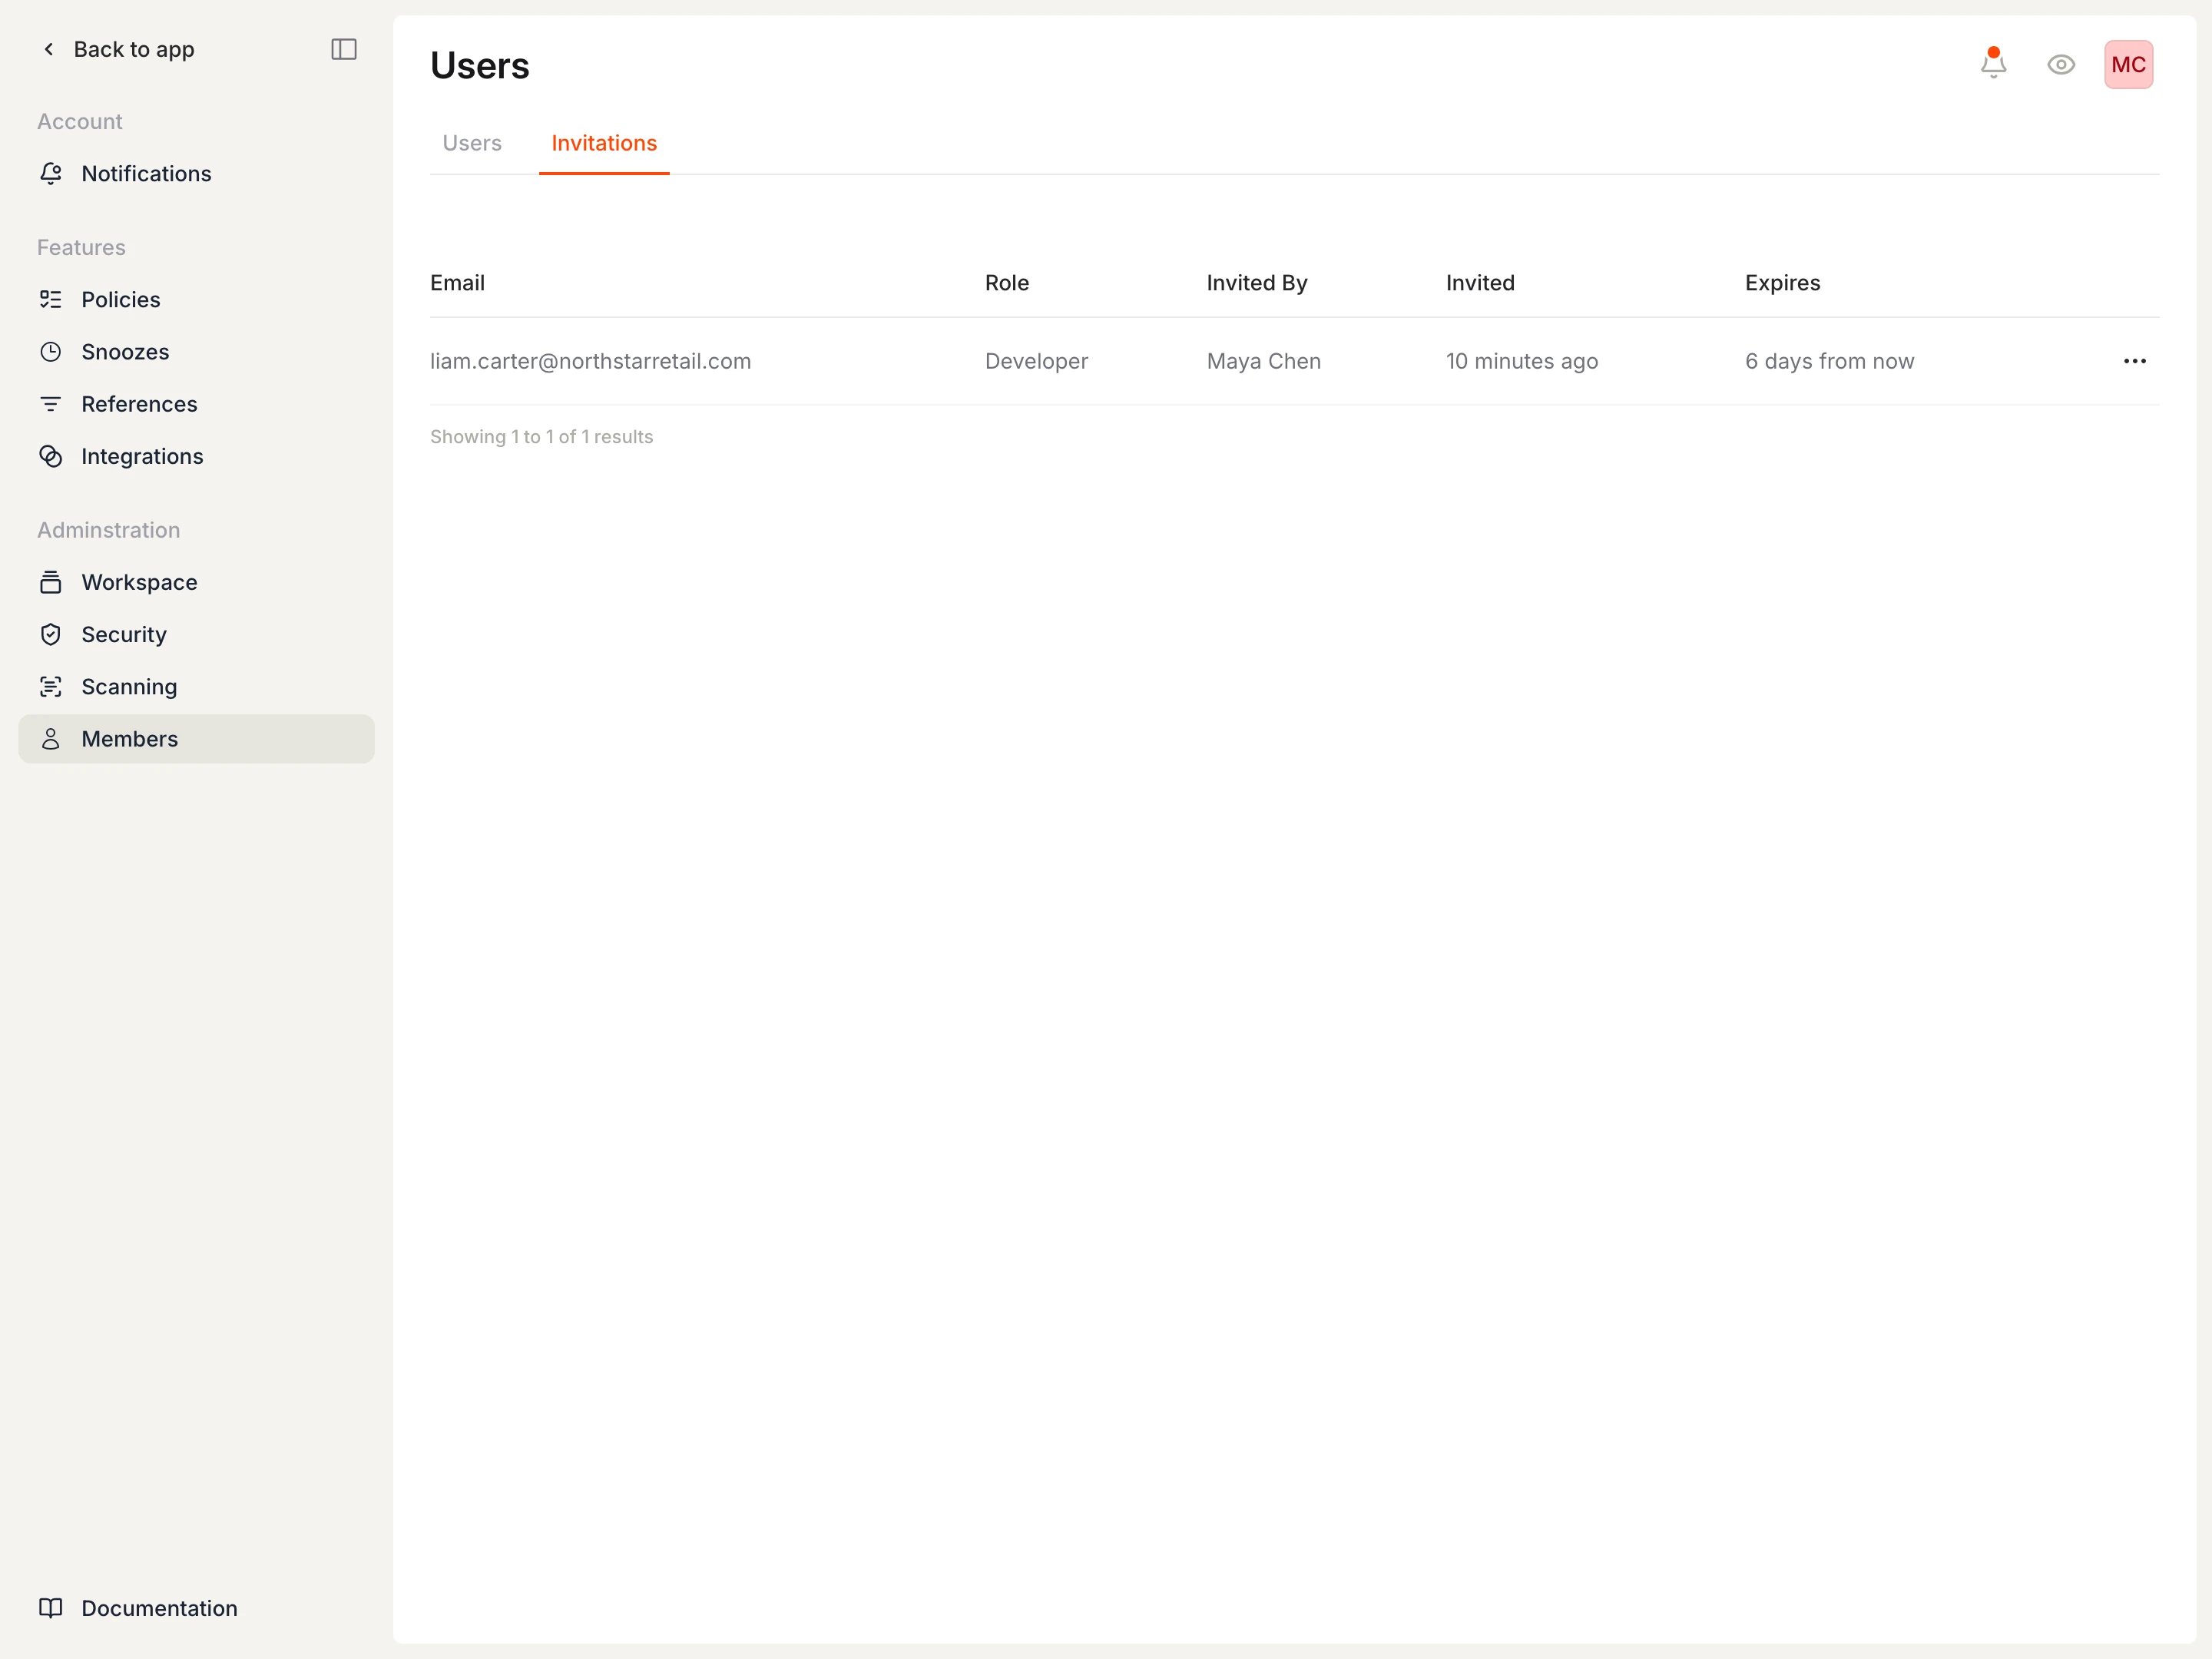
Invite the developers or security reviewers who will share ownership of future findings, then confirm the invitation appears under Invitations.
A pending workspace invitation ready for the new teammate.
See Invite your team for role selection, resending, and cancellation.