On the Vulnerabilities page, use filters or a saved view to find the item you want to review, then open it.
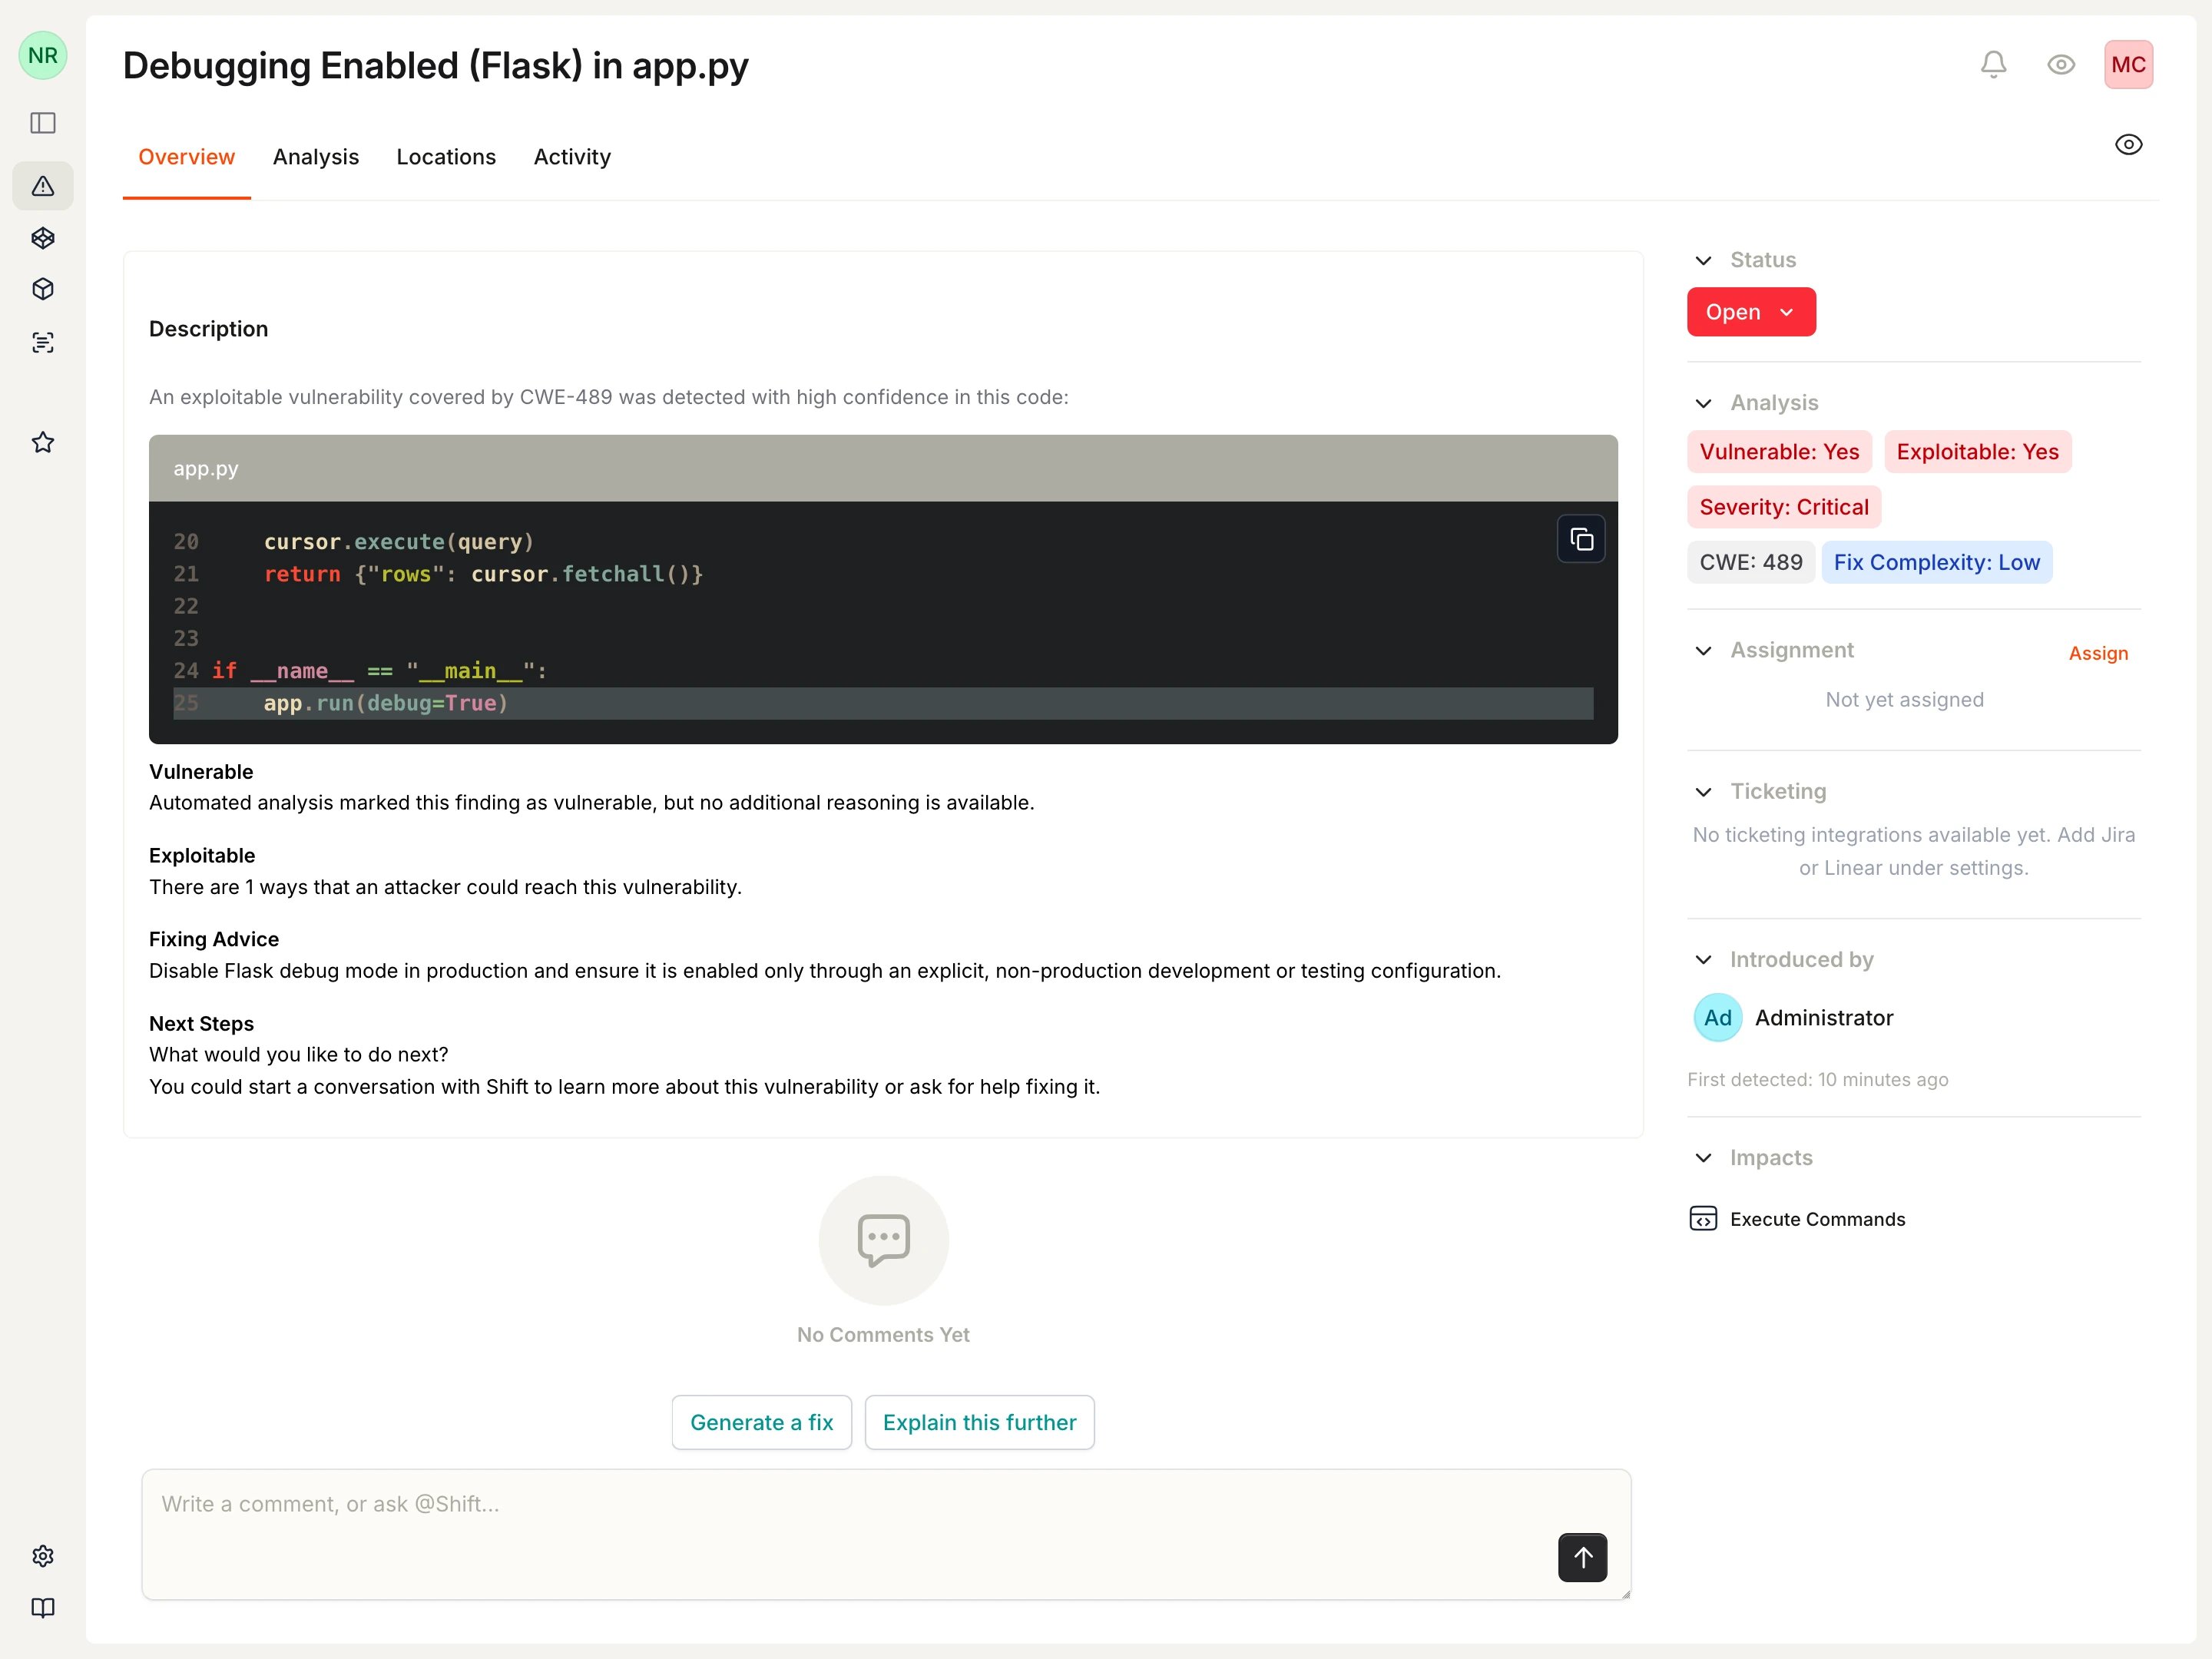
A vulnerability detail page with evidence and workflow controls.
2
Review the evidence
Check the information that supports the finding:
Description and highlighted source or advisory details
Vulnerable, Exploitable, Severity, and CWE indicators
Locations to understand affected branches, files, manifests, or assets
Analysis when call hierarchy or data-flow evidence is available
Activity for earlier decisions and comments
Use the evidence to decide whether the finding needs remediation, more review, or a final disposition.
3
Assign an owner
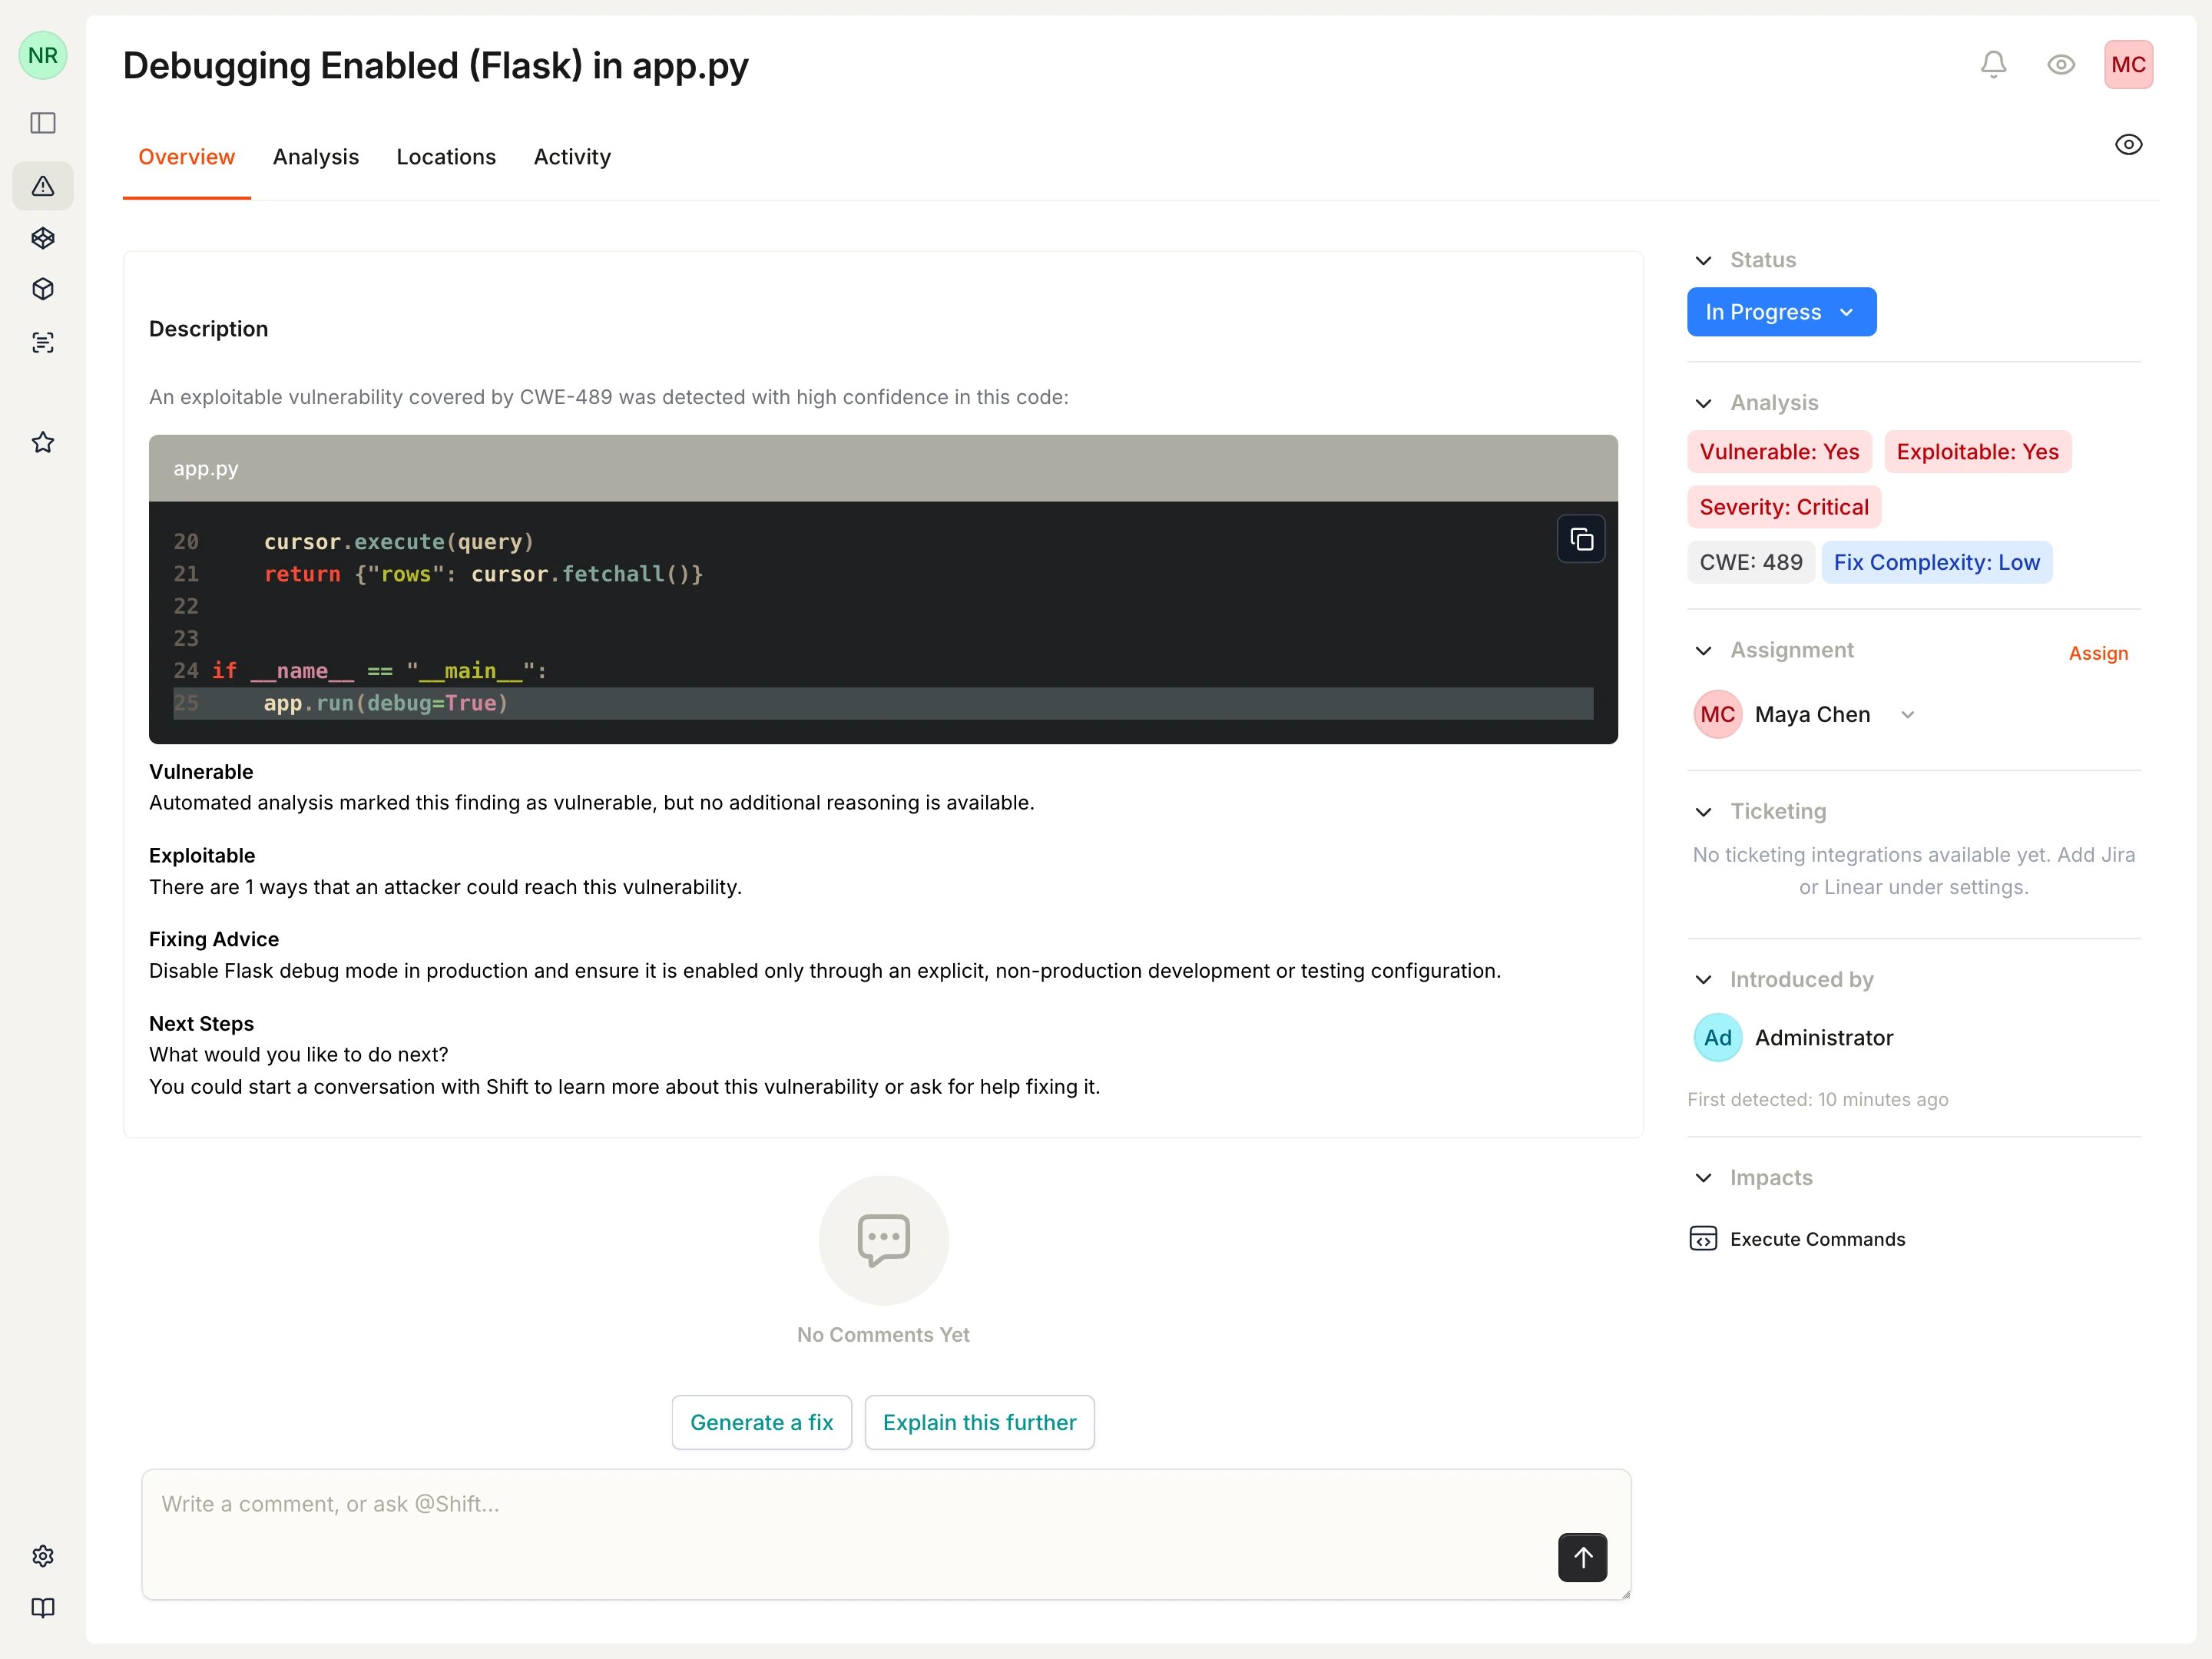
In Assignment, select Assign, then choose the team member responsible for the next action.
Assign the vulnerability to a workspace member.
4
Record active work
Select the current status button and move the vulnerability to the appropriate active status. Use In Progress when remediation or investigation has started, and add a short comment describing the next step.
An assigned vulnerability marked In Progress.
5
Record the final outcome
When work is complete, select a final status and resolution that reflects the decision:
Resolved with Fixed for a remediated vulnerability
Closed with False Positive when evidence shows the finding is invalid
Closed with Won’t Fix when the finding is valid and the risk is accepted
Closed with Duplicate or Cannot Reproduce when those outcomes apply
Add decision context before selecting Update Status. Include the evidence, reviewer, or linked discussion needed for another person to understand the outcome.
A false-positive disposition with review context.
The Activity tab records status changes, resolutions, assignments, and comments. See Vulnerability lifecycle for all statuses and resolutions.
6
Coordinate follow-up work
Create a Jira or Linear issue when remediation should be tracked outside Cysmiq. See Create tickets for the maintained ticketing workflow.